
What is Motion To Compel? (Checklists and Guides)
Legal parties aren’t always cooperative. While the law might state they must supply information to you before a trial, they can be non-compliant.
These tactics are understandable, but they don’t always fall within the scope of the law. Parties may be breaching proper procedures and could face court sanctions, such as the imposition of legal fees or contempt of court charges, where non-compliance persists.
Motion-to-compel tools give you a way to move things forward when the other side won’t play along. They let the court step in and require the release of information tied to your case.
When you know how and when to use them, delays lose their power, and required materials tend to surface much faster.
When to File a Motion to Compel
Filing a discovery motion or motion to compel becomes necessary when the responding party fails to meet their discovery obligations.
If you’re not getting the information you’re entitled to and informal efforts haven’t worked, a motion to compel may be your next step.
Parties Are Unresponsive to Interrogatories
If the opposing side ignores your interrogatories or provides vague, incomplete answers, it can stall your case preparation.
Without proper responses, you’re left in the dark and unable to fully assess your position or build a solid strategy. This kind of noncompliance isn’t just frustrating; it can seriously jeopardize your client’s chances in court.
As the moving party, you’re asking the court to step in and require the other side to comply with the rules. A motion to compel makes it clear that discovery isn’t optional and that delays or evasions won’t be tolerated.
If the responding party fails to answer interrogatories or respond with valid legal objections, the court may order them to produce the information and, in some cases, impose sanctions for failing to meet their discovery obligations.
Parties Won’t Produce Documents
When the other party fails to provide requested documents, filing a motion to compel discovery responses may become unavoidable. This type of noncompliance can throw off the entire case timeline and affect the fairness of the proceedings.
Here’s why a motion may be necessary in these situations:
- Missing documents can distort the facts: Without access to complete records, you’re working with half the story.
- It delays case resolution: Waiting on paperwork from an uncooperative party slows everything down.
- It undermines the discovery process: Parties are expected to respond honestly and thoroughly to all discovery responses.
- It opens the door to misconduct: When one side withholds information, it gives them an unfair tactical advantage.
- It weakens legal arguments: Without key documents, you may be unable to support your claims or defenses effectively.
If the other party refuses to comply even after informal efforts, the moving party can ask the court to order compliance.
Parties Are Deliberately Obstructing Information Discovery
Sometimes, one party takes deliberate steps to stall or block the discovery process. This could involve making excessive objections, refusing to turn over documents, or generally disrupting attempts to gather relevant information.
In both civil and criminal discovery, these tactics can prevent a fair outcome and waste valuable time.
If a non-complying party is intentionally obstructing the process, filing a motion to compel may be the only way to move forward.
But before doing so, courts often require good faith efforts to resolve disputes. This means reaching out to the other side, attempting to work things out, and documenting your efforts.
You’ll typically need to include a separate statement detailing each disputed item, your attempts to resolve the issue, and why the information is relevant. You’ll also need to request a hearing date with the court so both sides can present their positions.
For example, if an attorney refuses to produce financial records after repeated requests, claiming irrelevant privilege with no legal support, a motion to compel, supported by a clear paper trail, can pressure them to comply or risk court sanctions.
How to File a Motion to Compel
If the opposing side isn’t cooperating or you suspect they’re hiding crucial evidence, you may need to file a motion to compel.
But this process isn’t automatic; it requires careful steps to stay within procedural rules. Here’s what to do:
Meet and Confer With the Opposing Party
Before taking your issue to court, you’re expected to try resolving it informally. That means reaching out to the opposing side to meet and confer. This step helps the court determine that the requesting party made good faith efforts to work things out without legal intervention.
You should clearly address the missing discovery documents, explain what’s incomplete or missing from the responses, state the specific grounds for concern, and request further responses within a reasonable timeframe.
Be sure to document this meeting thoroughly; include the:
- Date
- Topics discussed
- Any follow-up communication
Courts often won’t consider a motion to compel unless you’ve attempted to resolve the issue first. This step lays the groundwork if you later need to compel production and shows the court you handled the issue responsibly before asking for formal enforcement.
Prepare Your Motion to Compel
If parties still fail to comply with your discovery requests, you should prepare a motion to compel. Make sure you follow established formats to avoid confusion or rejection for failing to provide the correct information.
A motion to compel typically contains:
- The name of the court
- The docket number
- The names, addresses, and details of the parties involved
- A summary of the case that provides context
- A list of discovery requests that the opposing party did not comply with
- A list of accompanying reasons explaining any non-compliance
- Reasons why the court should support discovery
The last element is critical. Courts will only issue a motion to compel if you can provide reasonable cause for the opposing party to comply with your request.
Acceptable reasons courts may accept include things like:
- Failure to release medical records relevant to a case
- Failure to supply expert deposition questions
- Getting in the way of discovery by abusing the rules of conventional legal proceedings to cause delay or incur higher costs for the opposing party
- Failure to take part in depositions
- Failure to supply documents relevant to the case
The more accurate you can make your objective, the more likely the court will grant your motion to compel. Whatever reason you choose must align with the circumstances of the case.
Serve the Motion
After the motion to compel is filed, the court begins reviewing the request and any objections from the other side. This stage matters, especially during discovery, since access to complete information can influence how the case moves forward.
In most courts, you can serve the motion electronically through e-filing. Some jurisdictions still require or allow physical service, so double-check local rules. Either way, the opposing party’s law office must receive proper notice along with all necessary information tied to the motion.
Once served, the court may allow both sides to present arguments. The judge will review the facts and determine whether the motion is justified based on what each party believes is required under the rules.
Key points to keep in mind:
- Provide a clear notice to the opposing party
- Include all necessary information and supporting legal documents
- Confirm service deadlines, which may be measured in court days
- Note any hearing set for a later date
If the court rules in your favor, it may order document production or answers and, in some cases, award attorney’s fees.
Go to the Hearing
If the other side still refuses to comply after service, the next step may be a court appearance.
A compel hearing gives both parties space to explain their positions, and the judge decides whether a court order is needed to move discovery forward.
At this point, the requesting party should be ready to show good-faith efforts to resolve the issue outside the courtroom.
That usually means bringing emails, call summaries, or letters that document your attempts to work things out before asking the court to step in. This supporting evidence helps show you weren’t rushing to the litigation stage.
Be prepared to walk the judge through the original propounded discovery, such as an inspection demand or unanswered interrogatories. Your goal is to clearly show what information is missing, why it matters, and why the court should compel answers.
In some jurisdictions, separate motions may be required, one to compel compliance and another tied to sanctions. Make sure your filings stay clear and focused on the discovery at issue.
Remember: A well-prepared hearing can lead to a court order requiring the other side to produce all the information they’ve been withholding.
Defending Against a Motion to Compel
On the other hand, you will be on the receiving end of a motion to compel. When this happens, you may find yourself being asked to provide information that conflicts with your clients’ rights or falls outside of the purview of the case.
Fortunately, you can also defend against these motions to protect your client against unjustified intrusions. Here’s what to do:
Talk to the Opposing Party
As described above, one option is to “meet and confer” with the opposing party. Talking to them can sometimes help you resolve the issue without going through any formal court procedures.
When meeting with the other side, record all relevant information, including talking points and any agreements reached.
Identify Objections
Review the motion carefully. The requested discovery may reach too far, miss relevance, or touch on privilege. You have the right to object, but those objections need to be clear, legally sound, and tied to specific issues in the request.
In certain situations, a quick reference can help you spot problems faster. A discovery objections cheat sheet can be useful here, especially when you’re reviewing requests that raise the same concerns again and again. It helps you confirm when objections apply and how they’re commonly framed.
Tools like Briefpoint can also support this step. Briefpoint uses artificial intelligence to analyze propounded discovery and flag issues based on similar case law.
It highlights potential problems, suggests language, and lets you insert objections directly into your response. You can also tailor responses or use templates that fit your strategy.
Once objections are finalized, file them with the court along with any required declarations. If the court agrees under the following circumstances, it may deny or narrow the formal request, which limits access to certain information that shouldn’t be produced.
Carefully Read the Motion
Before you respond, take time to carefully read the motion to compel. Don’t skim; go line by line. Understanding exactly what the propounding party is asking for can help you craft a more focused and accurate response.
Sometimes, the language in a motion can make it seem like they’re asking for invasive or overly broad requested information, but a closer read may reveal something more limited or specific. Misunderstanding the scope could lead to unnecessary concessions or weak objections.
Look closely at how the motion aligns with civil procedure rules. Are they citing the right statutes? Did they include all required supporting documentation? Has the motion been filed correctly and timely?
Legal AI tools can speed up this review. They can flag overbroad language, missing context, or irrelevant demands, which can help you respond with stronger objections.
Some platforms even let you click to insert objections directly into a verified response, saving time and reducing the risk of error.
File Your Response
Once you’ve reviewed the motion and prepared your objections, it’s time to formally respond.
File your response with the court, explaining why the motion to compel is improper or why the requested information falls outside the bounds of discovery rules. Your documentation should be clear, well-organized, and backed by legal reasoning.
Be sure to include all necessary attachments, such as a declaration detailing your informal resolution efforts, any prior correspondence with the other party, and other evidence, such as a service form confirming that your response was properly served on opposing counsel.
If the court schedules a hearing, make sure you attend. Showing up gives you the chance to explain your objections directly and reinforce why an order compelling further discovery isn’t warranted. Skipping it means losing your opportunity to be heard.
Be Prepared to Compromise
Finally, you may need to compromise with the opposing party to avoid going to court in some cases. This tactic might involve disclosing some information while protecting other sensitive data.
Automate the Discovery Process Without Waste
A motion to compel can either move your case forward or put you on the defensive.
Whether you’re filing one or responding to it, understanding the legal process, meeting all procedural requirements, and presenting strong arguments are key to protecting your client’s interests during the discovery phase.
But handling discovery disputes doesn’t have to drain your time.

Briefpoint can help you draft discovery responses, organize productions, and manage supporting documentation, all in minutes, not hours.
And with Autodoc, you can upload requests for production and case files to generate Word-formatted responses that link each request to responsive documents with page-level Bates citations.
Want to handle discovery smarter? Book a demo today.
Discovery Objections Cheat Sheets: Full Guide
What Are Common Objections to Discovery Requests?
There are many possible objections that can apply in discovery, depending on the request and the rules in play. That said, some objections come up far more often than others.
We’ve broken down some of the most common discovery objections and when they typically apply:
1. Relevance
A relevance objection applies when a discovery request seeks information that has no meaningful connection to the claims or defenses in the case. Even though discovery is broad, it is not unlimited, and the information sought must still relate to the issues actually being litigated.
Courts generally give legal professionals some flexibility during discovery, but they also expect requests to remain within reasonable bounds.
If a party intends to obtain information tied to events, documents, or topics that fall outside the relevant time frame or subject matter, objections apply to keep discovery focused.
It’s important to explain why the request is irrelevant rather than relying on a bare objection. Judges look for context, especially when evaluating whether the request has any potential value to the case.
Example: “Objection. The requested documents concern events that occurred outside the relevant time frame and have no bearing on the issues in dispute.”
A strong relevance objection clearly links the objection to the scope of the case while still complying with discovery obligations where appropriate, such as producing responsive material that does fall within a reasonable and relevant scope.
2. Overbroad and Unduly Burdensome
An objection for being overbroad and unduly burdensome applies when a discovery request is poorly defined, asks for an excessive volume of material, or would require a disproportionate amount of time and effort to answer.
Courts allow wide-ranging discovery in both federal and state courts, but they still expect requests to be reasonable and tied to the proportionality standard. Problems arise when a request lacks limits on time, subject matter, or scope.
For example, demands for “all documents” without context can force a party to review years of files, many of which have little relevance. In those situations, the burden of responding may outweigh any likely benefit.
Judges want more than a conclusory objection. Simply stating that a request is “too broad” is rarely enough. Courts expect an explanation showing why compliance would be unreasonable and how the request could be narrowed.
Example: “Defendant objects to this request as overbroad and unduly burdensome because it seeks all documents related to any insurance policy issued over a ten-year period, without limiting the request to the policy at issue or the relevant time frame.”
If only part of a request creates a problem, courts expect a targeted response. Producing what falls within a reasonable scope while objecting to the rest shows good faith and often helps avoid unnecessary disputes.
3. Privileged Information
An objection based on privileged information is used when a discovery request seeks materials protected by the attorney-client privilege, work product doctrine, or other applicable legal protections.
However, these objections need to be specific. You can’t just claim privilege without explaining why the information is protected. If you withhold documents, you’ll likely need to provide a privilege log listing what’s being withheld and why.
Example: “Objection. This request seeks information protected by the attorney-client privilege and is therefore not subject to disclosure.”
If only part of the response is privileged, courts expect you to produce the non-privileged portions while redacting the protected content.
Keeping a detailed privilege log can help avoid challenges and show that you’re withholding information for a valid reason, not just to block discovery.
4. Vague or Ambiguous
A vague or ambiguous objection comes up when a discovery request is worded in a way that makes it hard to tell what the other side is actually asking for.
If key terms are unclear or the request can be read multiple ways, responding becomes guesswork rather than a meaningful exchange of relevant information.
Courts generally expect parties to act reasonably. When a request is unclear but fixable, asking for clarification often makes more sense than refusing to respond outright. That approach keeps discovery moving while protecting you from overproducing or missing something important.
This type of objection often applies when requests involve things like:
- Broad or undefined references to communications or documents
- Requests for electronically stored information without limits on time, format, or source
- Vague demands for tangible things without explaining what categories are included
Example: “Objection. This request is vague and ambiguous because it fails to define ‘relevant communications,’ making it unclear what information is being sought.”
Addressing vagueness early helps avoid disputes later and makes it easier to provide a response that aligns with the actual scope of the case.
5. Confidential or Private Information
An objection based on confidential or private information applies when a discovery request seeks sensitive business data, personal records, or other legally protected material.
Although courts permit broad discovery, they also expect parties to take reasonable steps to safeguard information that should not be freely disclosed.
This often comes up when a request seeks materials within a party’s possession, custody, or control that include trade secrets, financial records, medical information, or proprietary processes.
Even if the information could be relevant or reasonably calculated to lead to admissible evidence, courts still balance that interest against privacy and confidentiality concerns.
However, simply labeling information as “confidential” is not enough to block production. If the material is relevant, a court may allow disclosure subject to limits, such as a protective order that controls who can access the information and how it can be used.
Example: “Objection. This request seeks confidential business records containing proprietary information not subject to unrestricted disclosure.”
Rather than refusing outright, discussing safeguards or narrowing the request with opposing counsel often resolves the issue more efficiently and reduces the likelihood of court involvement.
6. Already Available
Courts generally don’t require a party to produce materials that the other side can easily obtain on their own, especially if they’re public records, already in possession of the requesting party, or available from a third-party source.
This objection applies when the requesting party has equal access to the documents or data they’re asking for.
Examples: “Objection. The requested documents are equally available to the requesting party through publicly accessible records.”
If the request involves public or easily accessible records, you can reference where the party can obtain them rather than producing the documents yourself.
7. Calls for a Legal Conclusion
A discovery request asks, “Do you admit that the defendant was negligent in causing the accident?”
This type of question isn’t just seeking facts. It’s also asking for a legal analysis that only a judge or jury can decide.
Discovery is meant to gather factual information, not force a party to make legal conclusions. When a request crosses that line, it’s most likely appropriate to object.
Examples: “Objection. This request calls for a legal conclusion and is therefore improper under the rules of discovery.”
8. Compound Request
An objection to compound requests or compound questions is appropriate when a discovery request combines multiple inquiries into one, which makes it difficult to determine exactly what’s being asked.
Requests should be clear and specific, but when a single request covers multiple topics, timeframes, or document categories, it can create confusion or require separate responses.
Examples: “Objection. This request is compound, as it includes multiple separate inquiries that should be broken down into distinct requests.”
When a request includes both clear and unreasonable parts, responding to what makes sense while objecting to the rest is usually the best approach.
9. Calls for Speculation
Speculative questions in discovery are improper because they require a party to guess rather than provide factual information. Requests that ask how someone might have acted under different circumstances or what another person was thinking go beyond what discovery allows.
Courts expect responses to be based on personal knowledge or available admissible evidence instead of assumptions.
Example: “Objection. The question asks the responding party to predict actions or thoughts of another individual, which is not proper for discovery.”
If part of the request can be answered with known facts, it’s best to respond to that portion while objecting to the speculative parts. Courts typically reject blanket refusals if any part of the request is reasonable.
10. Calls for an Expert Opinion
Requests that demand technical analysis, medical evaluations, or legal interpretations often fall outside the scope of standard discovery responses.
If a question requires specialized knowledge that only a qualified expert can provide, an objection may be warranted.
Example: “Objection. This request calls for an expert opinion, which the responding party is not qualified to provide.”
If the responding party has relevant expertise, the court may still require an answer. However, if the request truly requires expert input, the appropriate response is to object and refer the matter to expert witnesses designated in the case.
11. Work Product Doctrine
A work product objection applies when a discovery request seeks materials prepared in anticipation of litigation, such as attorney notes, internal analyses, legal strategy, or case evaluations.
Under federal law, these materials are protected to prevent one party from gaining insight into how the other prepared its case.
In federal court, work product protection can apply even when the materials are not covered by the attorney-client privilege. Courts often look at the parties’ relative access to the underlying information.
If the requesting party can obtain the same facts on its own, there is usually little justification for forcing disclosure of work product.
Not all work product is treated the same. Factual work product may be discoverable in limited circumstances, while opinion work product, including mental impressions and legal theories, receives stronger protection.
There is also a real risk of waiving the protection if materials are shared carelessly or disclosed beyond the scope of the litigation.
Example: “Objection. This request seeks documents prepared in anticipation of litigation and is protected under the work product doctrine pursuant to federal law.”
Clear objections and careful handling of protected materials help preserve the work product protection throughout discovery.
Try Briefpoint for Faster, More Accurate Discovery Responses
Discovery objections are part of the job, but the process around drafting and responding often takes more time than it should.
Between reviewing productions, matching documents to requests, and making sure objections are clear and defensible, it’s easy for discovery work to take over your schedule.
That’s where Briefpoint can change how this work feels day to day.
Features like Autodoc live inside Briefpoint and handle much of the mechanical side of discovery responses. That includes finding responsive documents, applying Bates numbers, and generating Word-ready drafts you can review and edit.
When the busywork fades into the background, it’s easier to focus on substance, strategy, and accuracy. Discovery still requires judgment, but it doesn’t have to consume weeks of your time to get there.
Book a demo today and see how Briefpoint can change your entire workflow.
Clio vs. MyCase: A Complete Comparison Guide

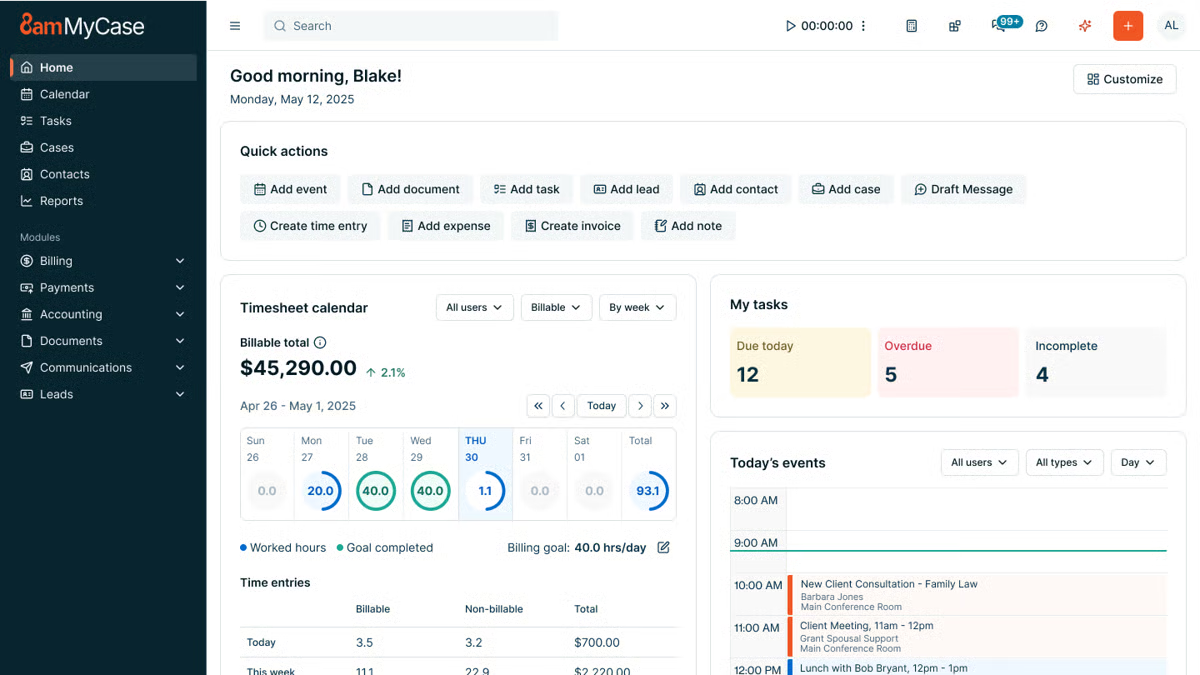
One of its key strengths is the built-in and secure client portal, where you can communicate and share documents with your clients without the hassle of extra emails.
Law firms with smaller teams love MyCase because it’s a breeze to navigate, which leaves them more time to focus on more valuable work.
What Is Briefpoint?
Briefpoint is an AI-powered discovery document automation tool that lets legal professionals prepare discovery responses and request documents within minutes.
Manual copying, pasting, and repetitive legal drafting no longer have to take up hours of your day. Briefpoint automates the heavy lifting so you can move through discovery faster and with fewer manual steps.
Simply upload a discovery request, and Briefpoint’s AI automatically pulls key details like case numbers, court names, party information, and more. That information is placed directly into your document to give you a solid draft right away.
From there, you can add objections simply by selecting the interrogatories you want to include.
Briefpoint also offers AutoDoc, which handles formatting and applies jurisdiction-specific rules so your discovery responses are properly structured and court-ready without extra cleanup.
You can download the document at any point to add final edits in Word.
Briefpoint also includes Bridge, a built-in tool that collects client input by translating legal questions into plain English. Client responses flow straight back into your working documents to cut down on follow-up emails and back-and-forth.
You can test Briefpoint for yourself by scheduling a demo.
Clio vs MyCase: Feature Comparison
When it comes to comparing Clio and MyCase, it’s important to break down their key features and see how they stack up against each other.
At first glance, the two platforms seem to offer a lot of the same features, but as you dig deeper, you’ll find they have distinct approaches to multiple areas of practice management.
Case Management
Clio offers a robust case management system designed to keep everything organized. For starters, you can track case timelines, store related documents, and even collaborate with your team.
Plus, it’s customizable, letting you adjust workflows to fit how your firm operates, and it integrates with a variety of other tools, giving you a lot of flexibility.
MyCase also provides a solid case management system, but leans a little more into simplicity. With a case management system that’s sturdy and reliable, the slight trade-off is a user interface that’s straightforward and easy to grasp.
You can organize cases, assign tasks, and track case progress without too much hassle, even if you have limited technical expertise.
However, MyCase has a significant edge in client communication. Its built-in client portal allows for easy updates and collaboration, which makes it super convenient for keeping clients in the loop.
Client Intake and Lead Management
Clio provides customizable intake forms that can be embedded on your website or shared with prospective clients through links.
For many Clio users, those submissions flow into Clio Grow, where new inquiries appear in a lead dashboard and can be reviewed, accepted, or declined before becoming contacts or matters.
This reduces manual data entry and keeps client information organized from the first interaction. Combined with secure messaging and other client-facing tools, Clio’s intake process connects naturally with the rest of the firm’s workflow.
Clio Grow also supports lead tracking, which gives firms visibility into how inquiries move from initial contact to active matters. That insight can be useful for teams that want a clearer view of intake volume and follow-up activity.
MyCase also includes client intake and lead management within its core platform. Firms can create online intake forms with conditional logic, collect client information, and route submissions into a built-in leads dashboard.
From there, leads move through defined stages, can be followed up with tasks and reminders, and converted into contacts and cases without re-entering data. Client communication and document sharing stay centralized through MyCase’s client portal.
Document Management
Clio takes a more detailed approach to document management. Files stay neatly organized by matter, sharing documents with your team or clients is straightforward, and everything lives in one central place.
If your firm already relies on tools like Google Drive or OneDrive, Clio’s integrations make it easier to keep files connected without jumping between systems. This kind of advanced document management tends to appeal to firms that want more control and flexibility as cases move forward.
MyCase keeps things simpler and easier to follow. The straightforward interface makes it easy to upload documents, find what you need, and share files without much setup.
Many firms also like MyCase’s matter templates, which help keep documents consistent across similar cases and cut down on repetitive work. It doesn’t offer as many integrations as Clio, but it focuses on making everyday document handling feel clear and manageable.
Billing and Time Tracking
Clio offers a comprehensive billing system that includes time tracking, invoicing, payment scheduling, and expense management.
You can track your time directly within the platform and then convert that into professional-looking invoices. Clio’s billing system is customizable, which gives you more control over how you bill clients and manage your firm’s finances.
MyCase also offers legal billing and time tracking, but it focuses on keeping things as simple as possible. Its invoicing system is easy to navigate, allowing you to create and send invoices with just a few clicks.
Although it might not be as customizable as Clio, it’s perfect for firms that want a quick, no-fuss solution.
Payment Processes
Clio makes it easy for clients to pay with Clio Payments, a built-in feature that allows for secure online payments via credit card or bank transfer.
You can set up automated reminders, which help make sure you get paid faster. Plus, Clio’s payment processing integrates seamlessly with its billing system.
MyCase has built-in payment processing, integrating with LawPay to handle online payments. It supports credit card payments and allows for partial payments, which can be useful for clients who prefer to pay in installments.
MyCase also provides automatic payment reminders, so it’s easier to stay on top of billing.
Task Management
Staying on top of deadlines and follow-ups is a big part of day-to-day legal work, and both Clio and MyCase cover the basics well.
Each platform lets you manage tasks directly within its case management software, so important things like assignments, due dates, and reminders stay tied to the right matter.
Clio leans into flexibility. Tasks can be linked to matters, assigned to specific team members, and paired with legal calendaring to help prevent missed deadlines.
For firms that want an all-in-one solution, these task features work alongside Clio’s other core tools to make it easier to keep work moving without switching systems. The trade-off is that it can take a little time to get comfortable with all the options.
Meanwhile, MyCase keeps task management more straightforward. Its user-friendly interface makes it easy to create tasks, assign responsibility, and track progress without much setup. This approach works well for small law firms that want clarity and structure without a lot of configuration.
Both platforms cover essential task management needs; the difference comes down to how much flexibility your firm wants versus how quickly you want to get started.
Clio vs. MyCase: Other Key Differences
Clio and MyCase share many of the same core features, but some of the bigger differences show up in the following aspects:
Target Market
Clio is designed to cater to a wide range of law firms, from solo practitioners to larger multi-lawyer firms.
Its broad feature set and extensive integrations make it especially appealing to firms that handle complex cases or need automated legal workflows and more advanced tools to manage a larger volume of work.
Because of its flexibility, Clio tends to attract firms that are willing to spend time learning the ins and outs of a more customizable platform.
MyCase, on the other hand, is primarily aimed at small to mid-sized law firms that value simplicity and ease of use. It’s particularly popular among firms that want to get up and running quickly without a steep learning curve.
Additionally, MyCase’s focus on client communication and straightforward design makes it a favorite for firms that don’t need a lot of customization but still want a solid, dependable tool for managing cases and expense tracking.
Key Features
What is each platform known for?
One of Clio’s standout features is its deep integration capabilities. With over 200 third-party app integrations, Clio is great for firms that need a highly customizable and flexible system.
While MyCase may not offer the same breadth of integrations as Clio, it makes up for it with its client portal, which is incredibly easy to use. The portal allows clients to view case updates, share documents, and communicate directly with their attorneys, all in one place.
Ease of Use
Clio packs in a lot of advanced functionality, which is great once you get comfortable with it. There’s a bit of a learning curve at the start, but the layout is logical, and the experience stays familiar thanks to a consistent setup across the platform.
If questions come up along the way, Clio’s support team is there to help smooth out the onboarding and day-to-day use.
On the flip side, MyCase takes a more plug-and-play approach. Most users can log in and start working almost right away, with very little training needed. Everything is laid out clearly, so tasks, matters, and client communication tools are easy to find and use.
If your firm likes having more options and doesn’t mind spending a little time learning the system, Clio gives you room to grow. But if you want something that feels natural from the first login and keeps things simple, MyCase makes that easy.
Pricing Models
Clio and MyCase both use tiered pricing to give law firms options based on their size and the functionality they need.
Clio’s plans range from core practice management to advanced automation and client intake tools, while MyCase offers a straightforward set of tiers with built-in legal accounting and billing features that many small firms appreciate.
Clio Pricing Plans
Clio has four main pricing plans:
- EasyStart – $59: Core tools for time tracking, billing, documents, e-signatures, and secure client communication.
- Essentials – $99: Adds client portal, texting, integrations, and more collaboration tools.
- Advanced – $139: Includes automated workflows, reports, custom roles, and enhanced law firm productivity features.
- Complete – $169: Adds intake forms, lead tracking (via Clio Grow), CRM-style tools, and the broadest feature set.
MyCase Pricing Plans
MyCase offers three plans:
- Basic – $49: Essential case management, billing, contact management, and client portal.
- Pro – $99: Adds unlimited two-way texting, client intake management, unlimited e-signatures, and advanced invoicing.
- Advanced – $119: Includes full-text search, advanced document automation, custom reports, MyCase Drive file sync, and split billing.
MyCase Accounting also offers built-in accounting tools and financial features like trust accounting and integrated payments without needing external products, which can simplify billing workflows for many smaller practices.
Both platforms usually include free trials, and exact prices can vary based on monthly vs. annual billing or promotions.
Clio’s higher-tier plans unlock more advanced features, while MyCase’s tiers focus on adding client-facing and financial tools across its competitive pricing structure.
Which One Is Better for Your Law Firm?
The choice between Clio and MyCase really depends on your firm’s specific needs. As you can see, both platforms offer excellent features but cater to slightly different types of law firms.
If your firm needs a more feature-rich system with greater flexibility and customization, Clio might be the better fit. However, if you’re looking for something more straightforward and easy to use, MyCase could be just what you need.
To help make your decision easier, here’s a quick comparison:
Feature | Clio | MyCase |
Case management | Robust and customizable with integrations | Simple and user-friendly |
Client communications | Basic client-sharing tools | Secure client portal for easy collaboration |
Client intake | Customizable forms with lead management | Built-in intake forms with lead tracking |
Document management | Advanced with third-party integrations | Easy to use, but has fewer integrations |
Billing and payments | Customizable with Clio Payments | Simple with LawPay integration |
How Does Briefpoint Fit Into the Mix?
While Clio and MyCase handle the essentials of practice management, Briefpoint adds a layer of efficiency that neither platform offers: discovery document automation.
If you’ve ever spent hours drafting requests for admission, production, or interrogatories, you know how tedious it can be. That’s where you can insert Briefpoint.
This AI-powered tool automates the whole process and cuts drafting time down to just minutes.
Here’s how it works:
- Smart data extraction: Just upload your discovery request, and Briefpoint’s AI pulls in routine details like case numbers, court names, and parties automatically.
- Quick objections: Need to add discovery objections? No problem. Just click the ones you want, and they’re instantly added.
- AutoDoc formatting: AutoDoc applies proper formatting, Bates numbers, and jurisdiction-specific rules so your documents stay consistent and court-ready.
- Client-friendly collaboration: With Briefpoint Bridge, you can simplify legal language for your clients and collect their input directly.
Whether your firm uses Clio or MyCase, Briefpoint integrates seamlessly to complement your practice management software with a simpler discovery process.
5 Best Legal AI Tools for Accelerated Growth
What Is the Driving Force Behind Legal AI Adoption?
The legal industry has always been conservative and slow to embrace change, but AI is starting to shift that. More firms are using AI tools to handle tasks like document preparation and discovery review, reducing human error and making legal work more efficient.
Still, full adoption is far from common. According to Clio’s Legal Trends Report, only 8% of firms have fully integrated AI into their workflows, while 17% use it extensively.
Many remain hesitant; 59% aren’t sure AI will actually improve their work, while others don’t trust it (44%), think it’s unreliable (34%), or feel the technology isn’t advanced enough yet (30%).
But for the firms that have taken the leap, legal AI is already proving its value.
Machine learning-powered tools analyze massive amounts of legal data and improve with use, which makes research, drafting, and case management faster and more precise.
The most widely used AI solutions right now include legal research platforms, document drafting tools, and general AI like ChatGPT.
As AI continues to evolve, law firms and legal professionals will have to decide how to integrate it into their workflows rather than whether to use it at all.
Top 5 Legal AI Tools in the Industry
The legal field is getting a tech makeover, and AI tools are leading the charge. If you’re ready to join the AI era, here’s a look at the top 5 legal AI tools on the market.
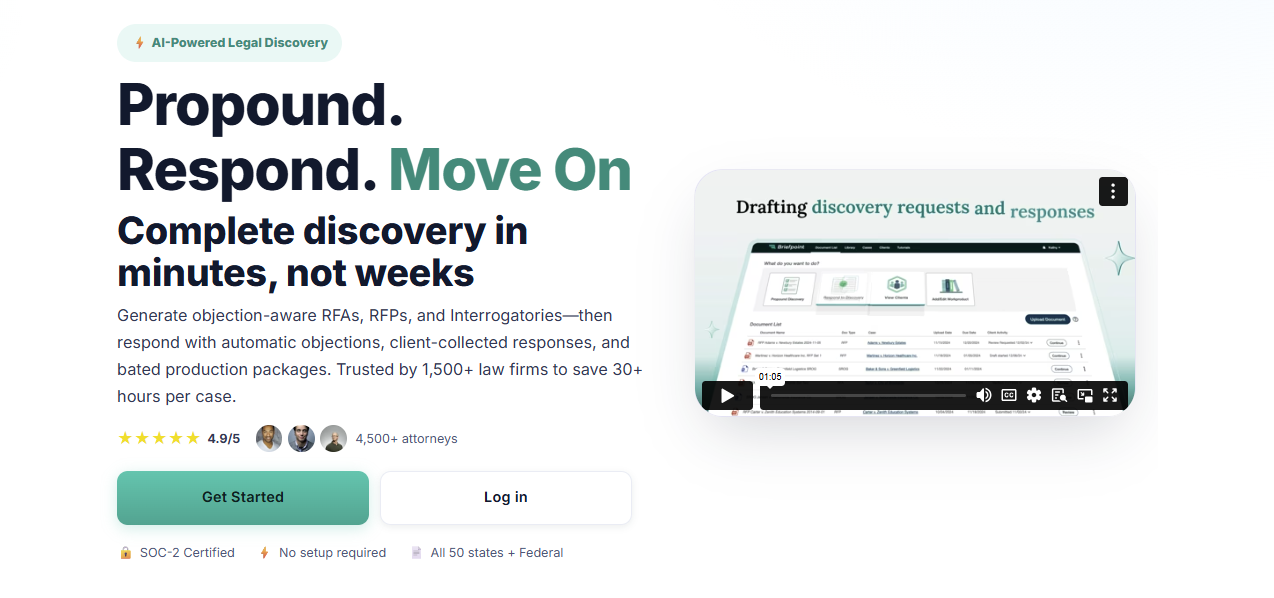
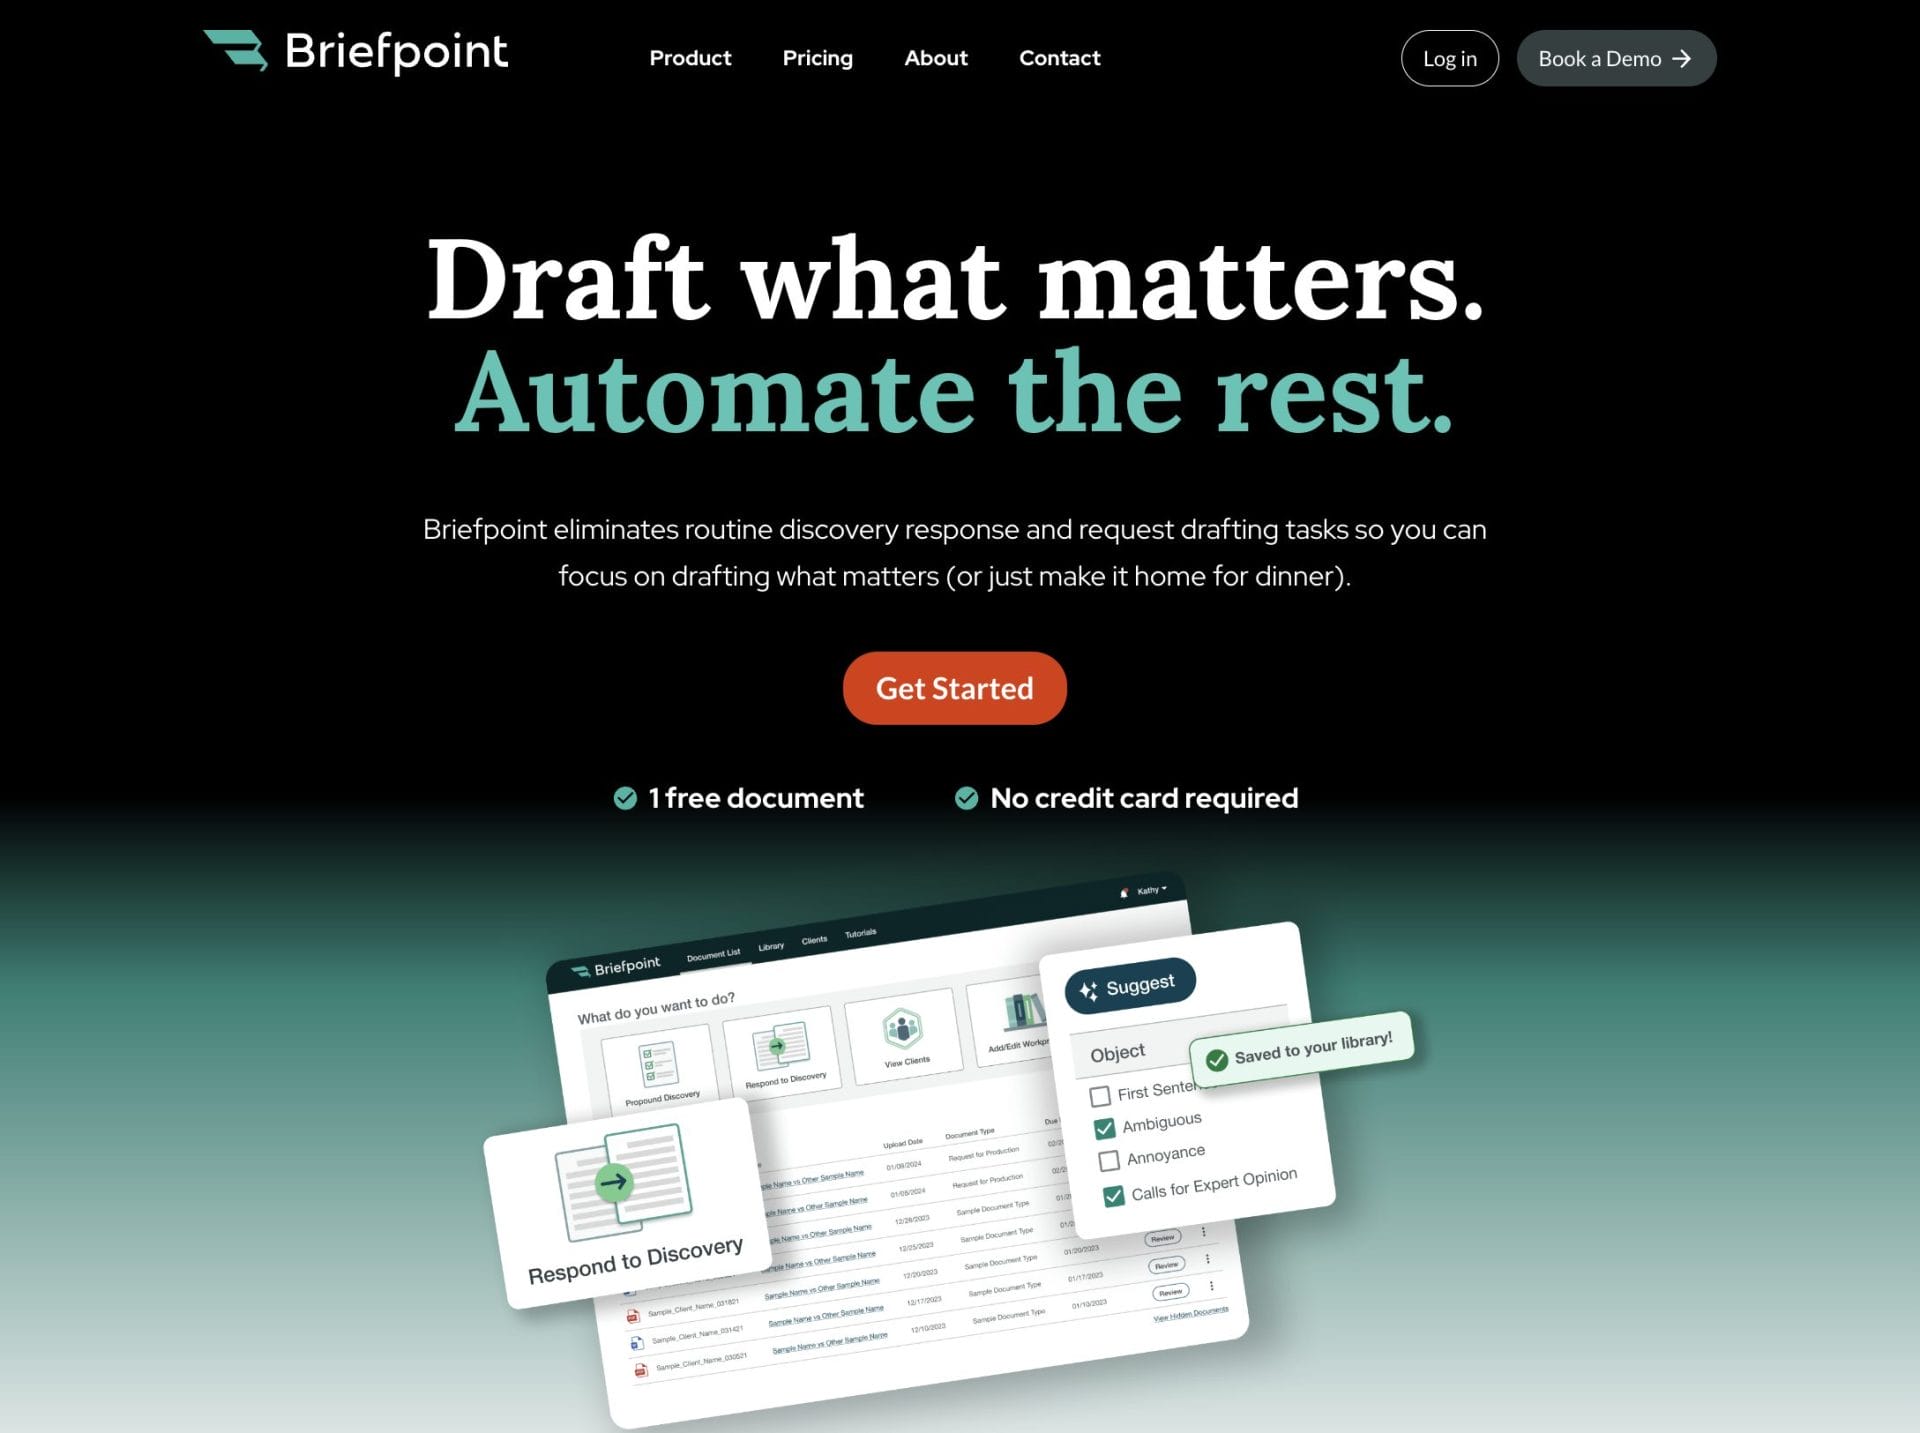
1. Briefpoint
Briefpoint is a discovery document automation tool that gives litigation teams a faster way to draft and respond to discovery. With this AI-powered tool, you can spend more time on strategy and less on formatting, reviewing legal texts, and chasing client input.
Essentially, it analyzes the requests you receive, helps you build objections and responses, and turns high-volume work into something you can manage in minutes.
The tool handles the core discovery documents that normally eat up the most time, including:
You can also use Bridge to collect client responses without long email threads. It turns complicated interrogatories into plain-language questions, gathers responses in a secure portal, and places everything directly into your draft.
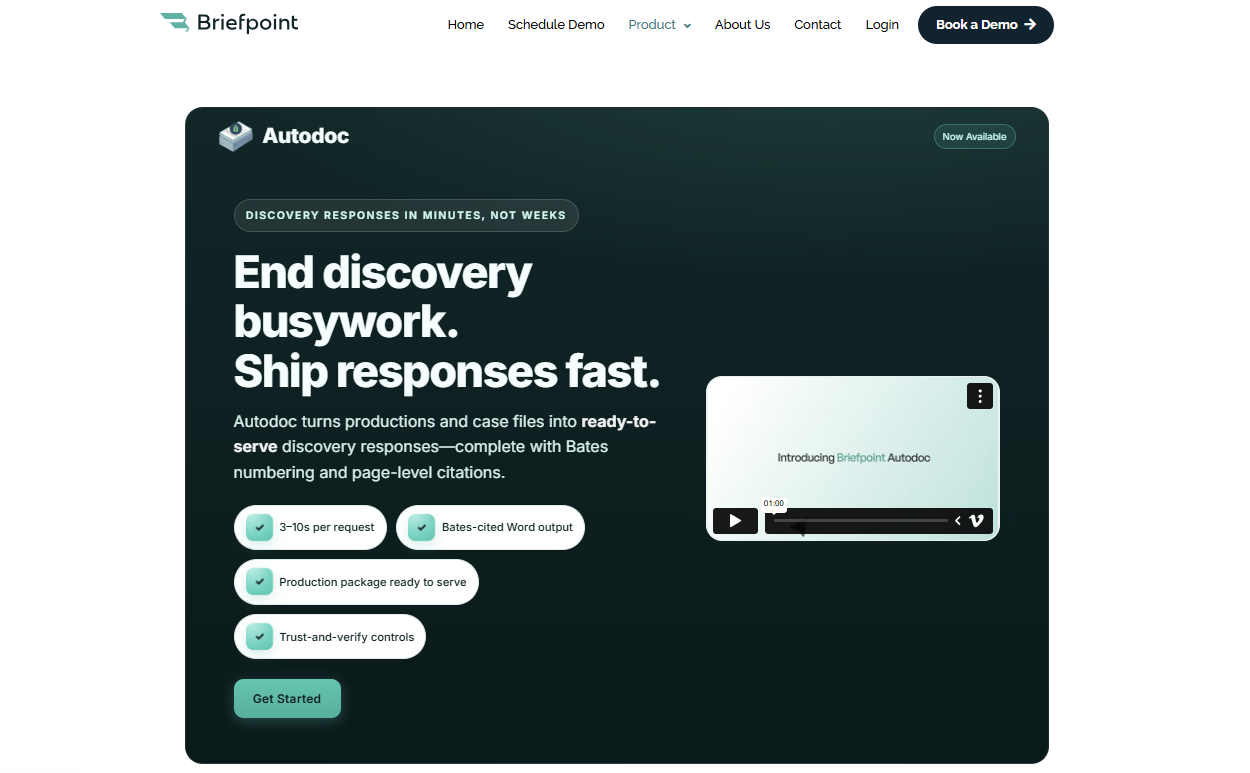
And if your matters involve large productions or due diligence-style review, Autodoc adds another layer of automation.
It maps documents to each request, pulls page-level Bates citations, and creates Word-ready responses and a production package, which makes high-volume discovery far more manageable.
Key features
- AI-assisted drafting: Builds objections and responses for RFAs, RFPs, and interrogatories to reduce manual drafting effort.
- Bridge client collection: Translates interrogatories into plain English or Spanish and gathers client input through a secure portal that flows directly into your draft.
- Autodoc production automation: Maps documents to each RFP, applies page-level Bates numbering, and generates Word-ready responses and a complete production package.
- Trust-and-verify controls: Shows where the AI searched and lets you confirm or deselect files before finalizing work product.
- Privilege tagging: Flags sensitive materials and supports the creation of a privilege list during high-volume or due diligence work.
- Word-first editing: Exports to Microsoft Word for review, adjustments, and final approval.
- SOC-2 certified security: Safeguards client data and discovery materials across every step of the workflow.
Over 1,500 law firms already rely on this workflow upgrade. Test Briefpoint yourself by scheduling a demo.
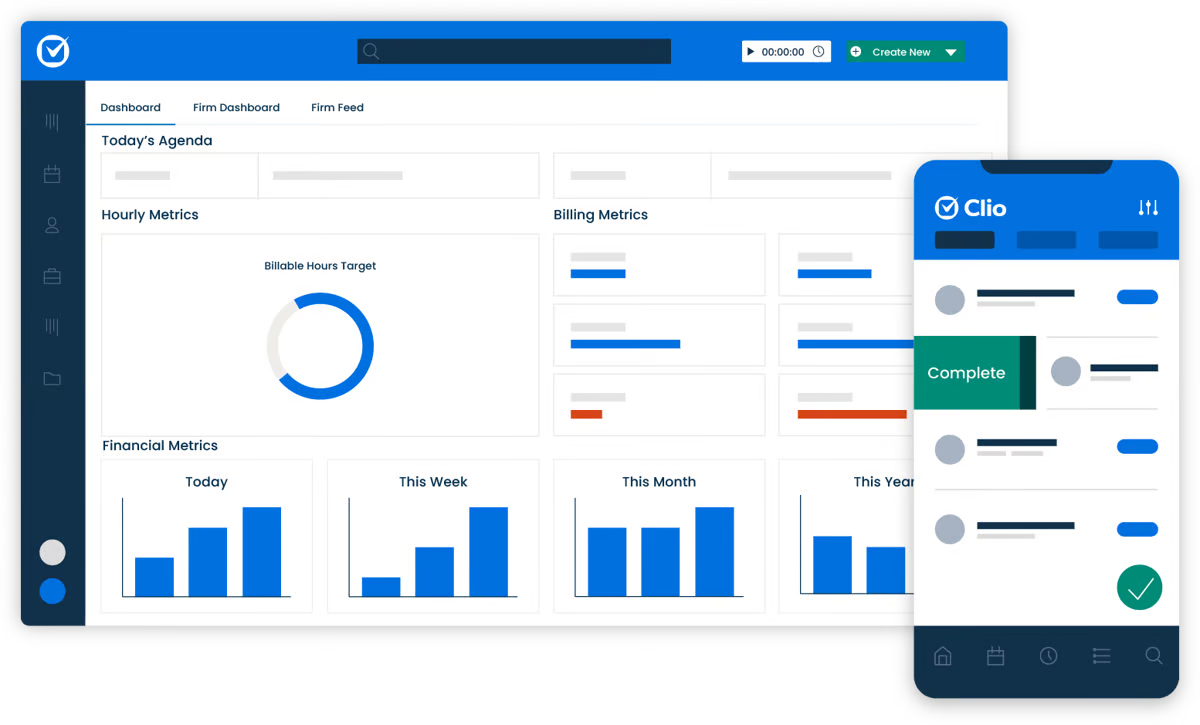
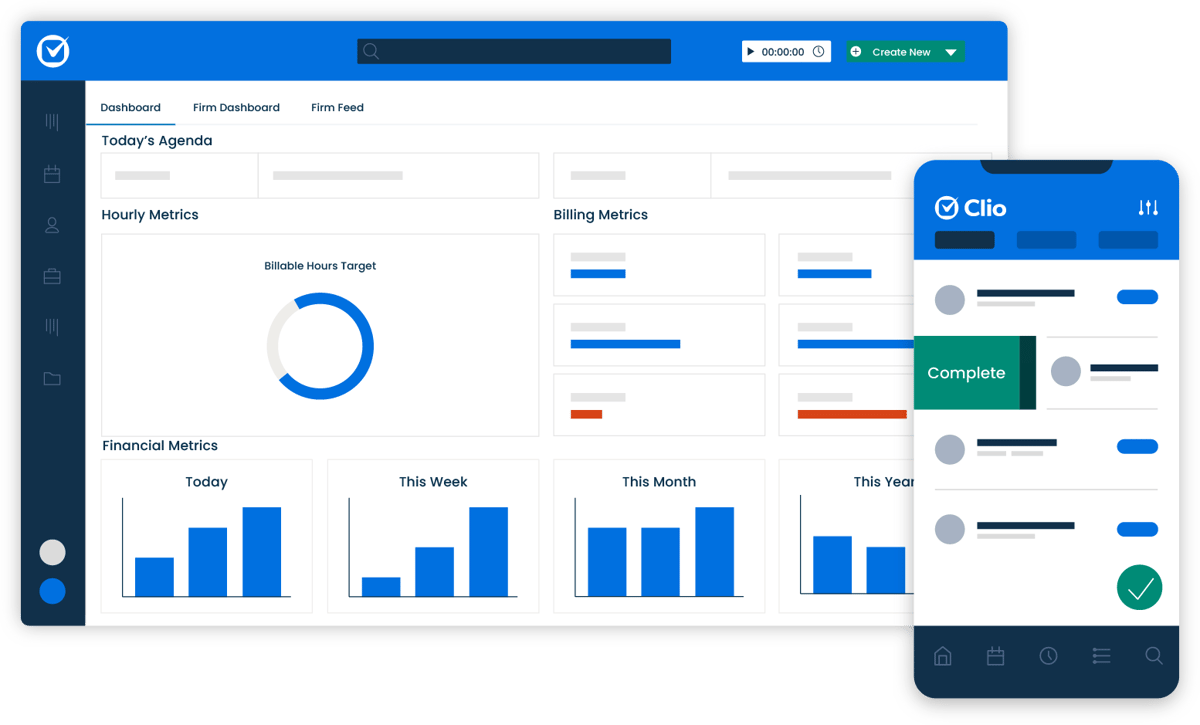
2. Clio
Clio is a widely used case management platform that helps firms organize matters, coordinate client communications, and keep daily work moving without relying on multiple documents across different systems.
Its layout is straightforward, and most teams appreciate how easy it is to get up to speed after onboarding.
Source: G2
A centralized dashboard gives you a clear view of case details, deadlines, billing activity, and upcoming tasks. You can manage legal document templates, store files, automate routine steps, and send documents out for electronic signature, all from one place.
Clio also integrates with a large ecosystem of apps and services, which makes it easier to stay ahead of scheduling, communication, and administrative work.
And because it’s cloud-based, you can access your matters from anywhere, whether you’re in the office or meeting with a client.
Key Features
- Case management tools: Organizes matters, deadlines, tasks, and client communications in one dashboard.
- Document management: Stores files, handles multiple documents per matter, and supports legal document templates.
- E-signature support: Sends documents for signature directly through the platform.
- Legal billing and time tracking: Tracks billable work and generates invoices with minimal manual entry.
- App integrations: Connects with email, accounting platforms, legal research tools, and other legal software.
- Cloud accessibility: Lets you work from any device without relying on local servers.
3. PatentPal
PatentPal is an AI platform built to lighten the workload involved in drafting patent applications. It focuses on the mechanical writing that often slows down IP professionals, turning early ideas and claims into organized legal content that’s ready for refinement.

Source: PatentPal.com
Users enter their claims, and PatentPal generates structured specifications, illustrative diagrams, and early drafts that follow common patent-office expectations.
The system relies on a knowledge graph and transformer-based models to interpret claim language, run document analysis, and produce content that fits the legal context of patent work.
The platform helps solo inventors, patent prosecutors, and in-house legal teams move faster during business development or early-stage filings, especially when there’s pressure to prepare multiple applications at once.
It also supports seamless integration with other drafting tools, which makes it easier to keep everything in one workflow rather than bouncing between platforms.
Key Features
- Claim-driven drafting: Turns user-submitted claims into full specifications, diagrams, and preliminary application drafts.
- Structured legal content generation: Uses transformer models and knowledge-graph data to produce text aligned with established patent standards.
- Document analysis tools: Interprets claim language, identifies relationships, and organizes information into consistent application sections.
- Diagram creation: Generates illustrative figures that support the technical narrative in the application.
- Seamless integration: Works alongside other drafting tools to keep the workflow organized from start to finish.
- Support for high-volume work: Helps legal teams and inventors move efficiently when managing multiple filings or rapid business development cycles.
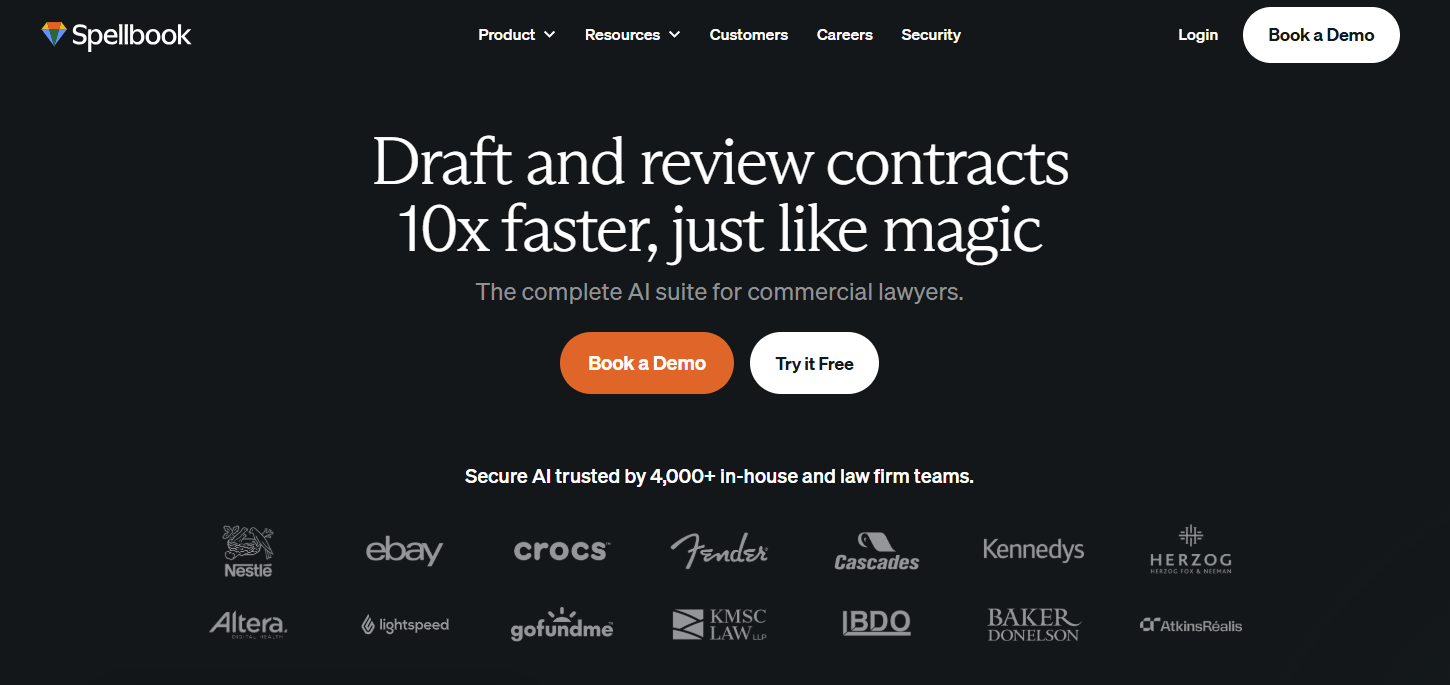
4. Spellbook AI
Spellbook AI is designed to help corporate and commercial lawyers move through contract drafting and review with far less friction.
It runs inside Microsoft Word, so you can analyze contracts, suggest revisions, and review legal documents without switching tools or disrupting your workflow.
Source: Spellbook.legal
Powered by GPT-4, Spellbook can work through detailed provisions, answer complex questions about the language in front of you, and flag risks you may want to address before finalizing a draft.
It’s particularly helpful when dealing with long agreements filled with boilerplate clauses or sensitive client information that requires close attention.
Key Features
- AI-assisted contract drafting: Suggests language, improves clarity, and helps build agreements more efficiently.
- Document review tools: Analyzes provisions, highlights risks, and reviews legal documents for issues that may need correction.
- Complex question handling: Answers detailed questions about definitions, obligations, or clause interactions directly within Word.
- Compliance support: Flags areas that may affect regulatory or internal requirements so lawyers can ensure compliance before sending a draft out.
- Boilerplate analysis: Reviews standard clauses to identify gaps, inconsistencies, or outdated language.
- Secure data handling: Manages sensitive client information with strong privacy and security safeguards.
- Microsoft Word integration: Keeps all drafting and analysis work inside a familiar environment, making adoption straightforward.
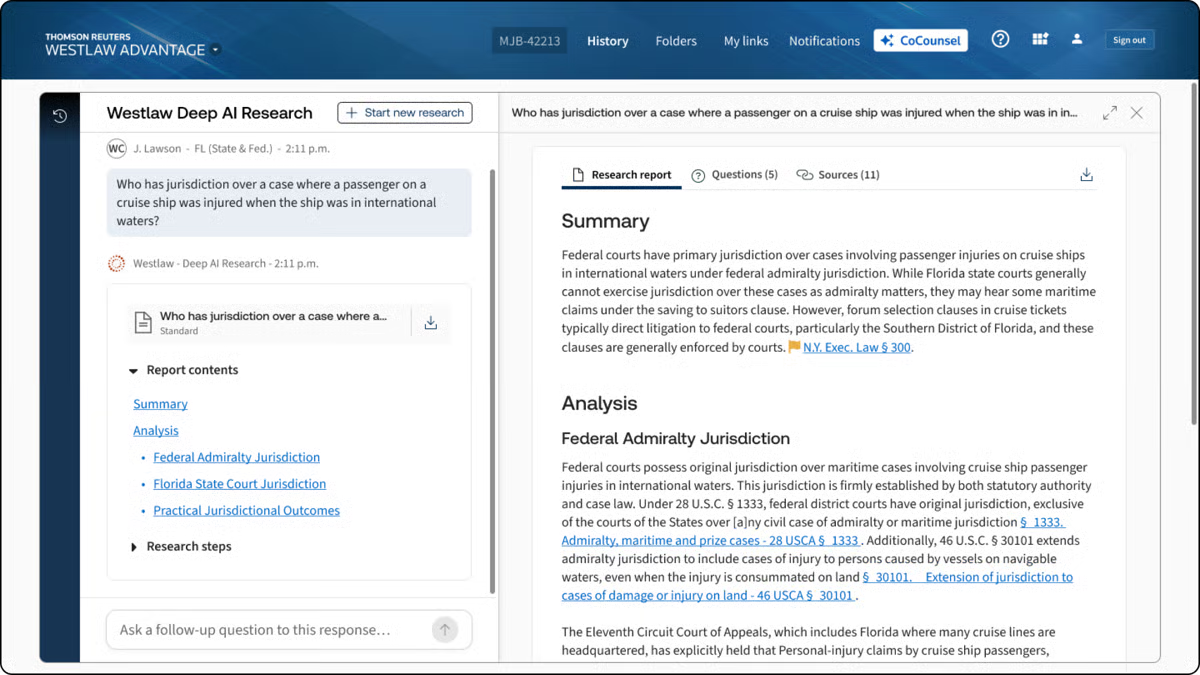
5. CoCounsel
CoCounsel is Casetext’s AI-powered legal assistant designed to help lawyers move through research, drafting, and document review with far less effort.
Many firms treat it as a virtual assistant that can answer legal questions, summarize large documents, generate research memos, and support early analysis before refining the final work product.
Source: G2
Trusted by more than 10,000 law firms, CoCounsel builds on Casetext’s long history of context-aware research.
It reads legal briefs, understands the legal framework behind your queries, and surfaces authorities that match the reasoning rather than just the keywords. This makes it especially helpful when you’re working through complex matters or evaluating case outcomes.
The chatbot-style interface makes it easy to ask questions in plain language and get structured responses quickly.
Whether you’re reviewing discovery or sorting through case law, CoCounsel helps lighten the load while keeping you in control of the legal judgment calls.
Key Features
- AI research assistant: Answers legal questions, prepares research memos, and provides insight into case outcomes.
- Brief analysis: Reviews legal briefs and identifies relevant authorities to guide stronger research.
- Automated legal document review: Processes discovery materials and flags important information for faster analysis.
- Drafting support: Generates early drafts, summaries, and language suggestions for legal documents.
- AI chatbot interface: Supports conversational requests and helps you work through complex issues quickly.
- Context-aware search: Surfaces case law based on legal reasoning and context rather than simple keyword matches.
How to Choose the Best Legal AI Tools for Your Business
Picking the best legal AI tool for your legal practice doesn’t have to be overwhelming or a guessing game. Here are some key tips to help you find the one that fits just right:
Pinpoint Your Practice’s Pain Points
The first step to finding the right AI tool is understanding where it can make the biggest impact. Take a look at the tasks that tend to take up a lot of time in your practice. Is document drafting slowing you down?
If so, a tool like Briefpoint can simplify this process and save hours on preparing responses and briefs.
Or, if you’re juggling client files and deadlines, a broader case management solution like Clio might be what you need.
Knowing your specific needs will help narrow down the tools that are truly worth considering.
Match Features with Your Needs
Once you’ve identified your needs, it’s time to match them with the features offered by different AI tools.
Some platforms are specialized for tasks like contract review, while others excel in managing discovery documents.
Consider the tools’ capabilities in terms of features and see if they integrate smoothly with your existing setup, like Microsoft Word or Clio. This will help make sure the new tool fits into your current legal workflow without causing disruptions.
Understand the AI
Before choosing a tool, it helps to understand what kind of AI is actually powering it. Different platforms rely on different AI models, and those choices can shape how well the tool fits your practice areas or day-to-day work.
Some tools focus on drafting support and use large language models trained to generate legal text. Others rely on machine learning trained on a legal database to improve tasks like litigation analytics, document review, or predictive insights.
A tool built for research might prioritize context recognition, while one designed for litigation strategy may focus on spotting patterns across past cases.
For example, an AI assistant like CoCounsel can answer complex questions and pull insights from a large research corpus, while a tool like Briefpoint uses AI to draft discovery responses and map documents to specific requests.
These are very different capabilities, even though both fall under “legal AI.”
Understanding what the AI is built to do (and what it isn’t) will help you choose a tool that matches the way you work rather than one that looks impressive but doesn’t fit your workflow.
Look for User-Friendly Design
Adopting a new tool shouldn’t be a struggle, so focus on finding one with an intuitive, user-friendly design.
AI-powered tools like Briefpoint and Clio are well-regarded for their simple interfaces, which help reduce onboarding time and make adoption smoother for everyone on your team.
A user-friendly platform is essential if you want to get the most out of your new AI tool without a steep learning curve or constant support.
Prioritize Data Security
Data privacy and security are non-negotiable in legal work. Legal AI software needs to prioritize protecting client information, especially when sensitive case details are involved.
Look for platforms that meet industry compliance standards like GDPR or HIPAA and offer strong encryption. Making sure these security measures are in place not only protects your clients but also gives you peace of mind, knowing that your data is secure.
Consider Support and Resources
Solid customer support and resources can make a huge difference in your experience with any new tool.
Check whether the provider offers accessible support options, like live chat, email, or phone, and if they have useful resources like training videos, guides, or webinars.
These resources can help your team make the most of the tool and troubleshoot quickly if issues come up.
Try Before You Buy
Lastly, always take advantage of free trials or demos when available. Testing out a tool firsthand is the best way to get a feel for how it fits into your practice and whether it meets your needs.
It also allows you to test the interface, performance, and integration options before making a financial commitment. By trying it out, you’ll know for sure if it’s the right choice for your practice.
Will AI Replace Lawyers?
It’s a question everyone in the field has heard by now, and it’s easy to see why. AI can accomplish daily work like drafting text, analyzing documents, and moving through certain legal tasks in seconds. But replacing lawyers entirely? That’s a very different conversation.
AI can support the work behind legal services, but it doesn’t understand people, nuance, or the strategy behind legal arguments.
It can read patterns, but it can’t grasp intent. It can review a document, but it can’t weigh the real-world consequences of a decision or guide a client through a difficult moment.
You’ve probably already seen how AI speeds up the background work. Those gains matter. They clear space for the part of the job that actually calls for judgment and experience. And that’s the part no model can replicate.
So, will AI replace lawyers? No. But it will change the rhythm of the work. The lawyers who get comfortable using these tools will move faster, think more clearly, and spend more time on the decisions that truly shape a case.
Briefpoint’s Role in a More Efficient Discovery Process
The discovery process can take over your week before you even notice it. One set of requests turns into hours of drafting objections, checking citations, and making sure everything lines up with jurisdiction-specific requirements. Not the best use of your time.
Briefpoint takes that weight off your plate by producing clean drafts, accurate citations, and organized responses that are ready for review.
What stands out is how naturally it fits into the way litigation teams already work. Objections follow your standards, client input flows straight into your documents through Bridge, and Autodoc handles the heavy lifting when you’re working with large productions.
You stay in control of the strategy while the routine steps move faster in the background.
It’s worth thinking about how much time those repetitive tasks take from your week. What could you shift your focus to if discovery didn’t demand so much of your attention?
If you want to see the difference for yourself, book a demo today!
A Complete Guide to Bates Numbering
What Is Bates Numbering?
Bates numbering is a simple but dependable numbering system used to keep large sets of legal documents organized. Essentially, it places a unique identifier on every page so reviewers, courts, and opposing counsel can reference materials without confusion.
The goal is to keep everything easy to track, especially when you’re dealing with long briefs, email collections, or mixed PDF files pulled from different sources.
Most teams follow a consistent format that includes a prefix, a number of digits, and a steady sequence.
For example, a production set might look like: PLTF_000001, PLTF_000002, PLTF_000003. The padded zeros help maintain order when sequentially numbering pages across hundreds or thousands of files.
This approach matters because it creates one clean path through every document in a case. You know exactly where a page came from, how it fits into the broader collection, and how to reference legal documents during review or production.
It also lowers the risk of mix-ups when multiple people are working with the same materials.
Today, most firms rely on digital tools that attach Bates numbers directly to PDFs, which creates tidy, searchable sets without manual stamping.
Why Bates Numbering Matters in Modern Legal Work
Before we talk about formats or tools, it helps to understand why Bates numbering still anchors modern legal workflows.
Most matters involve large PDF documents, email threads, spreadsheets, and other mixed formats pulled from different places. So, without a reliable method for keeping everything organized, even simple tasks can slow down.
Here’s why Bates numbering continues to matter:
- Clarity: Every page in a document set gets a unique identifier, which strengthens document identification during review or production.
- Organization: Sequential numbering creates a steady path through complex litigation documents, even when they come from different sources.
- Accuracy: Teams can track documents across long collections without losing context or misplacing pages.
- Consistency: All identifying elements follow the same pattern, helping everyone understand the order of materials at a glance.
- Efficiency: Automated tools let you easily add consecutive numbers, which helps when tracking large volumes of material.
These benefits apply to everything from small matters to cases filled with complex litigation files. Bates numbering acts like a shared roadmap for anyone handling the documents, whether they’re reviewing, producing, or referencing them in conversations with colleagues or opposing counsel.
If you want a faster way to prepare Bates-numbered productions, book a demo with Briefpoint and give Autodoc a look.
How Bates Numbers Are Typically Formatted
Bates numbers follow a straightforward structure that helps law firms organize discovery documents without guesswork.
Many teams pick a format that’s easy to read, consistent, and flexible enough to work across different matters. The goal is to create unique identifiers for every specific page so no two pages ever share the same number.
You’ll usually see one of three common approaches:
- Solely numeric: A simple sequence like 000001–000500, often used when the focus is on the page number alone.
- Alphanumeric strings: A mix of letters and numbers, such as PLTF_000001 or ACME-PRD-012345, which ties pages to a specific document or production set.
- Prefix with padded numbers: Something like DEF_001-000123, which keeps long sets organized and easy to sort.
A Bates stamper (digital or physical) applies these labels automatically. In digital workflows, teams often add a header or footer containing the number so it stays in the same place on every page.
For example, a production set might use:
PLTF_PROD_000001, PLTF_PROD_000002, PLTF_PROD_000003
A format like this keeps pages aligned, easy to cite, and simple to re-identify later in the review process.
When Legal Teams Use Bates Numbering
Legal teams turn to Bates numbering whenever they need a clear, reliable way to work through big batches of documents.
It’s used in the legal world to give every page a unique Bates number, which keeps conversations simple and prevents confusion as materials move through a case. This helps a lot in legal cases where you’re handling email threads, scans, spreadsheets, and multiple PDFs all at once.
Here are the moments when Bates numbering comes in handy:
- Litigation and eDiscovery workflows: Both sides can point to the exact page they’re talking about without guessing.
- Regulatory matters: Agencies get clean, well-organized files that are easy to reference.
- Internal investigations: Teams can see where each document came from and how everything fits together.
- Audits and compliance reviews: The numbering helps create a clean trail from start to finish.
- Large document exchanges: Everyone works from the same roadmap, even when thousands of pages are flying around.
Precision matters so much in the legal industry, and these numbers make organization easier and help teams avoid small mistakes that turn into bigger problems.
They also end up saving time, since reviewers don’t have to dig through files. No matter how messy the initial collection looks, Bates numbering brings it all into a workable structure.
Traditional Bates Stamping vs. Digital Bates Numbering
Traditional Bates stamping and digital Bates numbering try to solve the same issue, but anyone who’s handled both knows they feel worlds apart.
Traditional stamping meant pulling out physical stampers, lining up stacks of paper, and hoping every impression landed cleanly. If one page was smudged or slipped, the whole sequence had to be checked again.
Picture a paralegal stamping a 300-page production, only to notice halfway through that page 147 didn’t take the ink. Now the team has to rescan and edit PDF copies just to fix a small mistake.
It worked, but it slowed down litigation activities and left less time for trial preparation.
On the flip side, Bates numbering software shifts the entire process. You upload your files, set the rules, and the system applies perfectly formatted numbers across the full set. You can label hundreds of pages at once, adjust prefixes, and rerun sequences without wasting time.
For example, a production that once took hours manually can be processed in minutes with a digital tool.
Platforms like Briefpoint’s Autodoc make this even smoother. You can apply Bates numbering, organize materials, and generate ready-to-share files in one place. It’s faster, cleaner, and far more reliable than anything possible with a physical stamper.
Best Practices for Clean, Defensible Bates Numbering
Before you start adding numbers to documents, a few simple habits can make your sets cleaner, easier to review, and far more reliable. These are the Bates numbering best practices that usually help teams avoid headaches later on.
Set a Clear Numbering Plan First
Decide on your prefix, suffix, and start number before touching any files. This avoids gaps or duplicates once the set grows. Many teams map out the full sequence on a spreadsheet first, especially when multiple people are preparing materials.
A simple plan like PLTF_000001–PLTF_000850 keeps the order predictable from the first page to the next page.
Use a Reliable Tool to Apply the Numbers
Digital tools offer a smoother workflow than any Bates automatic numbering machine. They help you add header placements, adjust font size, and run checks across entire sets.
For example, tools like Autodoc handle large batches, catch inconsistencies, and support dependable litigation document management.
Keep Formatting Consistent Across the Full Set
Place Bates numbers in the same spot on every page (usually top-right or bottom-right. Keep the same style, padding, and spacing, even with mixed file types.
Example: DEF_PROD_000001 stays clearer and sorts better than switching between DEF1, DEF-02, or 0003 mid-production.
Check Your Output Before Sharing
Always verify the final set. Look for skipped pages, incorrect placement, or formatting changes. If you need to remove Bates numbering and re-run a batch, do it before producing the documents.
A quick scan prevents confusion later, especially in matters involving large review teams.
Autodoc Makes Bates Numbering Simple and Fast
If you’ve dealt with long productions or messy document sets, you already know how time-consuming Bates numbering and citation work can be.
Autodoc gives you a cleaner way to handle all of it. You upload your RFPs and case files, and it pulls responsive documents, adds page-level Bates citations, and prepares a ready-to-serve package in one go.
The process feels lighter because the tool handles the repetitive steps while you stay focused on review and drafting.
You also keep complete control. Autodoc shows where it searched, lets you confirm or exclude folders, and gives you Word-formatted responses you can edit before service.
If you want to see how it fits into your day-to-day work, book a demo and take a look at Autodoc in action.
RFP Response Best Practices: 10 Tips for Legal Professionals
Understanding the Typical RFP Response Process
The RFP response process can differ across law firms, but the structure stays largely consistent: review, plan, collect, and produce.
This process applies to nearly every firm managing discovery, regardless of size or the client’s industry. The objective is to deliver an effective RFP response that meets all procedural and court requirements while protecting confidential information.
When a request for production arrives, the legal team follows a defined sequence to stay organized and compliant. Here’s how the process typically unfolds:
- Review the request: Read each request carefully to understand its key requirements, including scope, date range, and document categories.
- Identify custodians: Determine which individuals or departments hold the relevant records or data.
- Preserve evidence: Issue a legal hold to suspend automatic deletions and prevent data loss.
- Collect documents: Gather files from servers, emails, cloud systems, and shared drives.
- Review for privilege: Examine each document for sensitive, privileged, or confidential information.
- Produce and log: Deliver responsive materials in the agreed format and maintain a detailed production log.
Although each firm may adjust this sequence to fit its internal systems, following a consistent RFP process helps maintain accuracy, defensibility, and smoother communication between parties.
10 Best Practices For Responding to RFPs
Responding to discovery requests can feel repetitive, but having a clear plan makes the process much easier to manage. These RFP response best practices help you stay organized, protect privileged data, and meet every deadline with confidence.
1. Read Every Request Carefully
It might sound obvious, but this step shapes the quality of your entire response. Every RFP should be read word-for-word, and this means checking for grammatical errors, unclear language, or missing definitions that could create confusion later.
Small mistakes in wording can change the meaning of a request, so it helps to compare it against past RFPs to see if the phrasing or scope has shifted.
Pro tip: Using RFP automation can make this process smoother by highlighting variations, tracking common phrasing, and flagging inconsistencies automatically.
When drafting new responses, note each request’s timeframe, topic, and format requirements. Highlight vague terms like “all communications” or “any records,” since those may need clarification before you begin collecting documents.
Many teams keep a shared tracker for each RFP, which records the assigned attorney, relevant custodians, and upcoming deadlines. That extra step keeps everyone on the same page and prevents inconsistent or incomplete responses down the line.
2. Identify Objections Early
Raising discovery objections early helps set clear boundaries for what will and won’t be produced. It also helps save time later by preventing unnecessary document reviews and disputes.
Courts expect clear, specific objections to every request, especially during propounding discovery, where each party must balance thoroughness with protecting privileged material.
That’s why it’s best to identify potential issues as soon as the RFP arrives rather than waiting until the production deadline approaches.
When reviewing each request, look for areas that might require clarification or limitation. Typical grounds for objection include:
- The request is overly broad or unduly burdensome
- The request seeks privileged or confidential material
- The information isn’t relevant to any claim or defense
- The data has already been produced or is easily accessible elsewhere
You can check out this discovery objections cheat sheet to learn more.
Documenting your objections and discussing them early gives both sides a chance to narrow the scope and focus on what actually matters to the case. You can also share your reasoning with the client to keep them informed and aligned.
Over time, tracking objections across multiple cases provides key insights into recurring issues, which can help your team respond more efficiently and consistently in future productions.
3. Communicate With Opposing Counsel
Clear communication with opposing counsel can prevent misunderstandings that often lead to disputes or duplicate work.
One of the most common mistakes during discovery is assuming both sides interpret a request the same way. Without early discussions, teams might collect far more (or far less) than what’s actually needed, making the process unnecessarily time-consuming.
For example, imagine a case where one side requests “all financial communications.” A quick call between counsel could narrow that to a six-month window and limit it to messages between specific departments.
That small clarification saves days of collection and review, especially for large corporations with thousands of files.
Open dialogue also helps level expectations regardless of company size. Smaller firms might have fewer resources and need more time to respond, while larger organizations may require agreement on custodians or data systems.
These conversations often reveal more insights about how the other side structures their review process, which can guide your own strategy.
4. Preserve Relevant Data
Once an RFP document is received, the first priority is to make sure nothing relevant gets lost or deleted. Preserving data protects your case and builds credibility in discovery.
Legal teams should issue a litigation hold right away to cover all potential sources of evidence. Failing to preserve files can lead to sanctions or weakened positions in court.
Examples of relevant data often include:
- Emails and attachments related to the dispute
- Internal chat messages from platforms like Teams or Slack
- Shared drive files, including spreadsheets, PDFs, and images
- System logs or metadata showing document history
- Archived backups that might store older communications
These bullet points show just how many areas can hold responsive information. The scope of preservation depends on the claims, time period, and other factors such as the client’s data systems and storage policies.
Documenting what’s preserved, when, and by whom creates a defensible record if questions arise later. Taking preservation seriously early in the process helps avoid complications and keeps every RFP response accurate and complete.
5. Collect Documents Methodically
A well-organized collection process keeps your RFP response accurate and defensible. Rather than gathering files randomly, follow a structured plan that aligns with the RFP requirements.
Start by identifying custodians and data sources, then coordinate with IT or discovery specialists to retrieve the information in a consistent format. Keeping a log of when and where each file came from helps maintain traceability if questions arise later.
Referencing previous RFP responses can also make the collection faster. Many firms maintain a content library of common documents, templates, or exhibits used in similar cases.
Plus, reviewing this library before starting a new collection can reveal overlaps or reusable materials, which, in turn, can save hours of unnecessary work.
During collection, avoid mixing responsive and nonresponsive data. Each file should be verified for completeness and categorized by request number or subject. When done methodically, this process prevents missed documents, reduces duplication, and simplifies later review.
6. Review for Privilege and Confidentiality
Before producing any documents, take time to review for privilege and confidentiality. This step prevents the accidental disclosure of sensitive material and maintains the integrity of your client’s case.
Both concepts serve different purposes, but often overlap during document review:
- Privilege protects communications between attorneys and clients that were made for legal advice.
- Confidentiality covers sensitive business, personal, or proprietary information that should not be shared publicly.
For example, an internal email between a company’s general counsel and a manager discussing legal risk would be privileged. Meanwhile, a spreadsheet containing customer data or trade secrets would be confidential. Both should be handled carefully.
Teams often use software filters, tagging systems, or secondary reviews to identify these materials before production. Redactions may be applied to portions of documents that contain protected content while allowing the rest to be shared.
Maintaining a privilege log listing each withheld document, its date, author, and reason, helps keep the process transparent.
7. Use Bates Numbering and Metadata
Consistent numbering and clear metadata are the foundation of an organized RFP response. Bates numbering assigns a unique ID to each page or file (for example, ABC_0001234), helping everyone in the case reference the same document without confusion.
Meanwhile, metadata adds searchable context, like author name, creation date, and file type, which keeps productions transparent and traceable.
Together, these details make document management smoother during review, motion practice, and depositions.
For example, if a deposition witness refers to “the July report,” having the Bates-stamped version (DEF_0004521) lets all parties identify the same page instantly. It also reduces disputes about what was produced and when.
Applying Bates numbers and managing metadata manually, however, can take hours or even days for large productions. That’s where RFP automation tools can change everything.
Briefpoint’s upcoming Autodoc feature eliminates the manual work entirely. It auto-drafts RFP responses, adds Bates numbering and page-level citations, and packages everything for download in just seconds.
Autodoc can process each request in 3–10 seconds, which can turn weeks of discovery work into one upload.
Join the waitlist for Autodoc today. Be first in line to end discovery work for good and let your next RFP production build itself.
8. Produce Documents in the Agreed Format
Another obvious tip, but it’s one that saves endless headaches. Before producing anything, confirm the agreed format with opposing counsel, whether that’s PDFs, TIFF images, or native files with metadata.
Producing in the wrong format often leads to rework, disputes, or even motions to compel. But when both sides understand how files will be delivered, the process moves faster and with fewer surprises.
Every production package should have clear headings and a logical folder structure. Labeling folders by request number, custodian, or topic helps everyone navigate the materials quickly. It also shows attention to detail, which can strengthen your credibility in discovery.
Once everything is reviewed, numbered, and labeled, perform a quick quality check before submission. Confirm that all Bates numbers are visible, metadata is intact, and no privileged files slipped through. This final step helps you feel confident that your production is defensible and complete.
9. Maintain a Production Log
Keeping a production log may seem routine, but it’s one of the simplest ways to improve quality and accountability in discovery.
A well-maintained log tracks what was produced, when it was delivered, and to whom. This creates a complete record that can be referenced if any issues arise later. It also makes rolling productions easier to manage and keeps your team aligned across multiple requests.
Your production log should include details like:
- Production date – When the documents were sent to opposing counsel
- Bates range – The specific numbering sequence for that batch
- Recipient – The party or firm receiving the production
- Description – A short summary of what that production includes
- Notes – Any clarifications or special handling instructions
These entries might seem small, but together they build a clear trail of accountability. Over time, analyzing your logs can also highlight recurring issues or inefficiencies that your team can fix to improve quality in future productions.
10. Review Responses Before Submission
Before sending anything out, take time to review every RFP response for accuracy and consistency. This final check ensures that objections align with what’s been produced and that no privileged or confidential documents were accidentally included.
Cross-check your production against the submission instructions from opposing counsel or the court. Make sure the file formats, naming conventions, and delivery methods match what was agreed upon.
If the instructions specify a secure portal or particular labeling method, confirm that everything meets those standards before sending.
Many teams assign a second reviewer (someone who hasn’t worked on the earlier stages) to spot inconsistencies or missing files. Reviewing responses with fresh eyes helps catch small errors, such as broken Bates sequences or mislabeled folders.
Once the review is complete and the package matches the submission instructions, you can send it off knowing your production is accurate and ready for review.
End Manual Discovery Work For Good With Briefpoint
Responding to RFPs is demanding work, especially when you’re managing dozens of requests, tight deadlines, and thousands of pages. Following these RFP response best practices helps create a process that’s consistent, defensible, and less stressful.
The more structure and documentation you build into your legal workflow, the more control you’ll have over accuracy and turnaround time.
But even the best manual process still takes hours of review and organization. Briefpoint was designed for exactly this kind of work.
Built for real legal teams, Briefpoint automates drafting and document preparation so you can focus on the parts of discovery that truly need your expertise.
And now, with Autodoc, Briefpoint is taking discovery automation to the next level. Autodoc turns productions and case files into ready-to-serve discovery responses, complete with Bates numbering, page-level citations, and auto-drafted RFP answers in just seconds.
If you’re ready to save weeks of manual review and make your next production effortless, join the waitlist for Autodoc and be first in line to end discovery work for good.
Want to see how Briefpoint works? Schedule a demo today.
5 Bates Numbering Best Practices Every Law Firm Should Know
What is Bates Numbering?
Bates numbering or Bates stamping is a system used in the legal field to assign unique identifiers to pages in a document set. Each page receives a number in sequence, often with a case code or prefix, which makes it simple to reference and track.
For example, a page might be labeled as “CASE000123,” which shows both the case and the page order.
The method began with mechanical stamping devices but is now almost always handled through software. This allows law firms to apply numbers to thousands of pages quickly and consistently, reducing the risk of missed or duplicated references.
Bates numbers are especially valuable during discovery, when large volumes of documents are exchanged between parties. They provide a reliable way to cite specific pages in motions, depositions, or hearings without confusion.
Outside of automating legal discovery, firms also use them for compliance, internal record keeping, and accurate indexing of files.
While the concept is simple, Bates numbering has become a standard practice because it creates order and accountability in cases where document volume can be overwhelming.
Bates Numbering Made Faster with Briefpoint Autodoc
Bates numbering makes document productions more reliable, but even with best practices, it can take teams hours or even weeks to get through discovery. The legal industry has long accepted this as part of the job, but that’s changing.
Tools like Briefpoint’s upcoming Autodoc move past manual review and turn entire productions into ready-to-serve discovery responses in seconds.
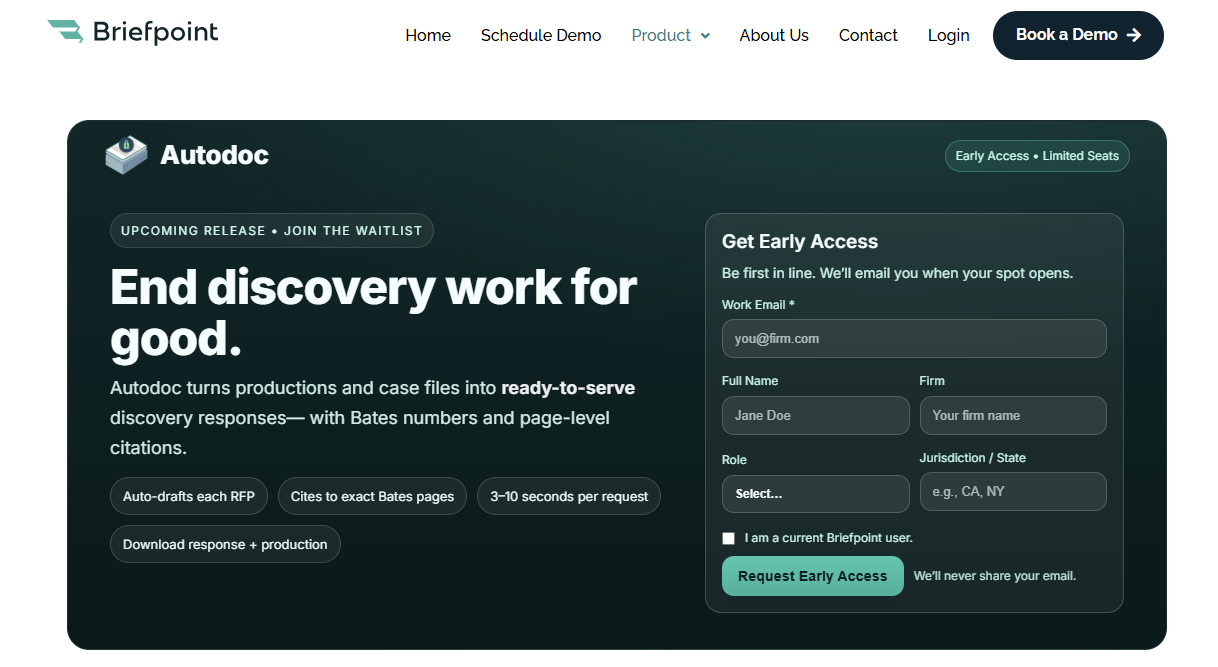
But Autodoc doesn’t just apply Bates numbers. It auto-drafts each request for production, cites directly to the exact Bates pages, and packages the finished response with the production itself.
What used to take weeks of reading, tagging, and drafting can now be done in the time it takes to upload a set of files.
Early access is open, but seats are limited. Join the waitlist to be among the first to replace page-by-page review with an upload and download workflow.
- Auto-drafts every RFP
- Cites to Bates numbers and page-level content
- Produces responses in 3–10 seconds per request
- Packages discovery responses and productions for immediate use
Sign up for Early Access to Briefpoint Autodoc today and end discovery work for good.
Best Practices for Bates Numbering
Applying Bates numbers may seem straightforward, but consistency matters if you want documents to stay organized and defensible in court.
Following a few best practices helps avoid errors and keeps every page easy to reference. Take these into consideration:
1. Use a Consistent Numbering Format
It may sound like a simple step, but keeping a consistent numbering format is the foundation of proper Bates numbering.
Without it, tracking large volumes of material quickly becomes confusing, especially when multiple documents are combined into a single production set.
Consistency means that every page follows the same pattern, whether you are working with scanned paper files or digital PDF files.
A good practice is to decide on the identifying elements you want to include, such as a case prefix or client code, followed by a fixed number of digits.
For example, “ABC000001” is easier to reference than “ABC1” because the leading zeros keep everything aligned and sortable. The number of digits should remain the same throughout, so the pages line up correctly when organized electronically.
When applying numbers, software tools often allow you to click “insert Bates number” across an entire batch, which saves time and keeps the format uniform. This is especially important when you need to reference legal documents later in motions, depositions, or court filings.
2. Apply Bates Numbers Sequentially Without Gaps
Bates numbering only works if the sequence is unbroken. Sequentially numbering pages makes legal documents easier to manage, especially when dealing with productions that span thousands of files.
If numbers are skipped or repeated, it can create confusion and raise concerns about missing material.
When using PDF software, you can set a starting number and let the system apply consecutive numbers across the entire batch. This is useful when handling more than one document at a time because the numbering continues throughout, rather than restarting with each file.
The result is a clean reference number system that makes organization easier later.
Best practices include:
- Number every page, including blank or cover sheets
- Pick a consistent starting number, like “000001”
- Avoid restarting for one document within a larger set
- Verify that no pages were skipped during processing
Applying sequential numbers across all pages keeps your record reliable and ensures each document can be cited without confusion.
3. Place Numbers in a Non-Intrusive, Consistent Location
Once you decide on a numbering format, the next step is deciding where those numbers should appear.
The goal is to make them visible without covering text, signatures, or important details. Traditionally, lawyers used a Bates automatic numbering machine, a physical stamp that pressed numbers onto each page.
With that method, the lower right corner was the most common choice, because it left the rest of the page untouched.
Today, digital tools make it easy to apply the same rule. When you open files in PDF software, you can easily add consecutive numbers to every page in a set, and the program will place them in the same location across the batch.
For instance, you can set the numbers to always appear in the bottom margin of each page, which keeps them uniform and out of the way.
This consistency matters when dealing with large productions. If some pages are stamped at the top and others at the bottom, it slows down the review and makes references harder.
Whether you are numbering one document or need to add folders full of files, choosing a single location and sticking to it helps keep your records professional and easy to follow.
4. Keep a Log or Index of Bates Ranges
Applying Bates numbers is only part of the process. To make the system useful, firms should also maintain a log or index of Bates ranges.
This record shows which files were stamped, what their Bates prefix was, and how the pages are grouped. Essentially, it acts as a quick reference when someone needs to search across large sets of documents without checking each page manually.
An index is especially valuable in document management, where hundreds of files may share the same case numbers. When you track ranges, you can confirm at a glance that all materials were included and that no overlap occurred when you add Bates numbering to multiple files.
A clear log should include details such as:
- The Bates prefix assigned to the document set
- The starting and ending numbers in the sequence
- A description of the page content or file type
- Related case numbers for cross-reference
With this approach, lawyers and staff don’t have to guess where a document belongs. Instead, they can consult the index, locate the correct reference, and move directly to the material they need.
5. Automate When Possible and Double-Check Output
Large productions can involve thousands of pages, from medical records to complex litigation files. Of course, trying to stamp each one by hand wastes time and risks mistakes.
Modern PDF tools let you apply Bates numbering automatically, even across multiple PDFs at once, so you don’t have to restart sequences or worry about duplicates. Automation keeps page numbers consistent while letting you focus on document review.
Examples of automation include:
- Batch processing multiple PDFs: Apply Bates numbering to an entire folder at once so that every file receives consecutive numbering without restarting for each document. This is especially useful when handling discovery responses with hundreds of files.
- Custom alphanumeric strings: Add case codes, prefixes, or client identifiers so that numbers reflect the context of the matter, e.g., “MED000123” for medical records or “CASE2025-0001” for litigation files.
- Automatic continuation across files: Instead of resetting for every specific document, the numbering sequence carries forward, which avoids giving two pages the same number.
- Consistent placement on every page: Software applies the number in the same page position across the batch. This helps keep the format professional and easy to read during review.
But even with automation, always check how many pages were stamped and confirm sequences remain unbroken.
A Practical Guide to a Virtual Assistant For Lawyers
Who Are Virtual Legal Assistants?
A virtual legal assistant is a remote professional who supports lawyers, law firms, and legal professionals with a mix of tasks that go beyond basic admin work.
While they do handle administrative tasks like scheduling and drafting letters, many also take on legal-focused work such as research, preparing forms, or updating case management systems.
This growing field is part of a global trend. As of 2025, there are an estimated 40 million virtual assistants worldwide, with many working from regions like Latin America, Asia, and Eastern Europe.
With such a large talent pool, law firms can find assistants who match their specific needs, whether that’s general office support or more specialized legal help.
For solo attorneys, a legal virtual assistant can act like an extra member of the legal team and help lighten the load. Meanwhile, larger firms often use them to handle overflow during busy periods.
Of course, they’re not a replacement for licensed professionals, but they do cover the kind of recurring work that allows lawyers to focus on core legal work.
What Do Virtual Legal Assistants Do?
A virtual assistant for lawyers can step into many roles depending on what a firm needs most. Some handle administrative work, while others take on legal-focused tasks under attorney supervision. Here’s a closer look at the areas where they usually help:
- Scheduling and email management: Keep calendars updated, coordinate client meetings, triage inboxes, and track important deadlines.
- Document drafting and preparation: Draft letters, forms, contracts, and demand letters, plus handle document management so files are easy to find.
- Legal research and case support: Pull case law, prepare summaries, and organize discovery files. For example, compiling liability rulings in a personal injury case.
- Billing and accounting help: Send invoices, track payments, follow up on overdue accounts, and maintain expense records on legal billing software.
- Client services: Manage client intake, guide onboarding, schedule follow-ups, and answer routine questions while protecting confidentiality.
- Data entry and software tasks: Enter client details, record deadlines, upload and label files, and keep systems accurate using legal software.
Essentially, these responsibilities cover the routine side of practice so attorneys can put their time and energy into work that demands more legal knowledge and expertise.
What Virtual Legal Assistants CANNOT Do
While independent virtual legal assistants and agency-based staff are valuable, there are limits to their role. They’re talented professionals, but they’re not licensed attorneys.
With that in mind, knowing where the line is drawn keeps your practice compliant with ethical guidelines and protects your clients.
A few areas that remain off-limits:
- Provide legal advice: Only licensed attorneys can counsel clients or offer legal opinions, even if assistants have years of experience.
- Represent clients in court: Virtual assistants cannot appear in hearings or trials on your behalf.
- Sign or file documents as an attorney: They can help with drafting and document management, but final signatures and submissions are the attorney’s responsibility.
- Break client confidentiality agreements: Assistants may handle sensitive files, but lawyers must make sure proper safeguards are in place.
- Act as substitutes for paralegals: While they can take on research or drafting tasks, they don’t replace even certified paralegals working under attorney supervision.
In short, virtual assistants are there to support, not replace, licensed professionals.
Remember: Treating them as partners for administrative and case prep work while respecting boundaries helps maintain compliance and strengthens trust with clients.
A Guide to Hiring the Right Legal Virtual Assistant
Since we’ve covered what virtual legal assistants can and cannot do, the next step is figuring out how to bring the right one onto your team. The hiring process matters just as much as the work itself, because a poor fit can create more headaches than help.
In the legal profession, where confidentiality and accuracy are non-negotiable, taking time to choose carefully pays off. So, here are a few steps to keep in mind:
1. Define Your Needs First
Before you start interviews, make a clear list of what you want handled. Is it mostly scheduling and billing, or do you need someone who can assist with legal research and strategic planning?
Being specific keeps the process focused and prevents you from hiring someone who doesn’t match your expectations.
Writing out the tasks in detail also helps you decide whether you need a generalist who can handle day-to-day admin work or someone with prior legal experience. To get started, consider listing needs like:
- Managing calendars and client calls
- Handling billing and follow-ups
- Drafting legal documents for attorney review
- Supporting research and case prep
- Keeping files and legal software updated
2. Decide on Flexible Plans or an In-House Team
One of the first choices in the hiring process is deciding whether your firm is better served by an in-house team or by flexible arrangements with virtual legal assistant services. Both options come with advantages, and the right fit depends on how your legal practice is structured.
With an in-house setup, you get people in the office every day who can handle tasks face-to-face. This model gives you direct oversight and tighter integration with the rest of the staff.
However, it also comes with higher overhead costs. Salary, benefits, and office space add up quickly. For small or growing firms, that expense can feel heavy.
On the other hand, working with a remote legal assistant or a broader virtual legal staff offers flexibility. You can scale hours up or down depending on the caseload, and you only pay for the support you need.
Some firms even work with an entire outsourced team for billing, intake, and scheduling. This arrangement can free up attorneys without forcing the firm to commit to permanent hires.
3. Look for Professional Oversight
If you decide to hire through an agency rather than working with an independent assistant, it’s worth checking whether they provide a dedicated account manager.
This role acts as a bridge between your firm and the assistant, making sure tasks are handled correctly and deadlines are met.
An account manager also gives you a single point of contact, so you’re not left chasing updates or repeating instructions.
This layer of oversight adds value in a few ways. It creates accountability, since there’s someone actively monitoring the assistant’s performance. It also gives you room to request changes, refine the workflow, or scale support as your caseload grows.
4. Prioritize Confidentiality and Fit
Skills and experience are important, but in the law practice, trust and compatibility matter just as much.
A dedicated virtual assistant may be working remotely, yet they’ll have access to sensitive client data and case files. That means they should approach confidentiality with the same care you’d expect from an in-house employee.
Always ask about their familiarity with confidentiality protocols, data handling practices, and whether they’re comfortable signing agreements that protect client privacy.
It’s also smart to dig into their background with legal software and the type of onboarding process they’re used to. Someone who can quickly adapt to your systems will save you from having to spend weeks training them on the basics.
Beyond the technical side, cultural fit plays a big role. A good assistant doesn’t just complete all the tasks you assign. Beyond that, they mesh well with your team’s communication style and workflow.
So, ask yourself: Will this person handle client interactions in a way that reflects the professionalism of your firm? Do they seem organized and responsive?
Choosing someone who respects privacy, adapts quickly, and works in sync with your team can make the difference between just filling a role and finding long-term support.
Where to Find Virtual Legal Assistants
Once you’ve decided you need extra help, the next step is figuring out where to actually find it.
The good news is there are plenty of places to look for legal virtual assistant services, but the best option depends on your budget, the kind of work you need covered, and how much oversight you want.
Common routes include:
- Freelance platforms: Sites like Upwork or Fiverr give you access to a wide pool of on-demand support. You can hire someone for short-term projects like drafting legal documents or handling administrative support without committing to a long-term arrangement.
- Specialized agencies: Agencies that focus on legal support can match you with assistants trained in legal operations, client intake, e-filing, or even bookkeeping professionals for billing. They’re usually more reliable but can cost more, and some niche specialists may be harder to find.
- Referrals from the legal profession: Asking colleagues or bar associations often leads to trusted recommendations. A referral can give you confidence that the assistant has real experience in a law firm setting.
Each path has trade-offs, but with the right search, you’ll find support that fits your needs and makes running your practice far smoother.
Questions to Ask During the Hiring Process
Asking the right questions during the interview will help you gauge whether they can truly support your firm’s needs and free you from the time-consuming tasks that slow you down.
Consider asking:
- Do you have experience with legal software? Look for comfort with case management systems and document management, since that’s where many assistants spend time.
- Are you familiar with legal databases? Research support during case preparation is easier when an assistant knows how to locate statutes, rulings, and references tied to legal procedures.
- How do you handle client confidentiality? Assistants will interact with sensitive details from both prospective and existing clients, so they must follow strict privacy practices.
- What’s your availability and time zone? Confirm they can respond promptly, help track critical deadlines, and adapt to your work hours.
- Have you managed intake before? The ability to handle client intake (gathering forms, organizing information, and scheduling meetings) adds real value from day one.
As you may have observed, these questions go beyond basic skills and help you find someone who can seamlessly support both your team and your clients.
Still, they’re just a place to start. You can add more based on your firm’s size, practice areas, and the kind of support you expect from a virtual assistant.
Power Your Practice With Virtual Assistants AND Briefpoint
A virtual assistant for lawyers can handle calendar management, research, billing, and client communication. In doing so, they can genuinely lighten the load so attorneys can focus on higher-value work.
But some parts of practice, like discovery, call for more than administrative help.
Briefpoint is the right AI-powered tool to handle that. Our AI-powered platform is built specifically for the legal field, designed to take the most tedious drafting work off your desk and turn it into accurate, ready-to-use outputs.
From automating discovery responses to preparing legal documents, Briefpoint helps both attorneys and their assistants cut hours of manual effort.
With Briefpoint, firms get:
- Faster document preparation and review
- Automated formatting and organization of discovery responses
- Reliable accuracy that reduces human error
- More time for case strategy and client advocacy
When you combine the everyday support of a virtual assistant with the automation of Briefpoint, your practice gains the balance of personal service and advanced legal tech.
If you’re ready to see how Briefpoint can support your practice (and your assistants), don’t wait. Book a demo with Briefpoint and watch how much easier your workflow can be.
Paralegal vs. Lawyer: Who Does What in a Law Firm?
Paralegal vs. Lawyer: Key Differences
Paralegals and lawyers may work side by side, but their roles aren’t interchangeable. Their authority, responsibilities, and daily focus set them apart in clear ways. Here’s how the two positions differ across the core areas of legal work:
1. Education and Training
In the legal industry, the education path you choose shapes the work you’re allowed to do. Paralegals and lawyers take very different routes, and their education and training requirements reflect the responsibilities they hold in the legal system.
Paralegal Education
Paralegals focus on learning how to assist lawyers rather than practicing law themselves. They don’t need a law degree, but most employers look for some form of formal training.
Common options for paralegals include:
- Associate’s or bachelor’s degree in paralegal studies
- Certification programs or post-bachelor’s certificates in legal studies
- On-the-job training in smaller firms for entry-level roles
Some programs are approved by the American Bar Association (ABA), which can make candidates more competitive.
While paralegals can handle research, organize case files, and draft legal documents, they can’t represent clients or sign legal filings on their own.
Lawyer Education
Only lawyers can provide legal advice and appear in court on a client’s behalf, which is why their training is longer and heavily regulated. Their path generally looks like this:
- Complete a bachelor’s degree in any field
- Graduate from an ABA-accredited law school with a law degree (J.D.)
- Pass the state bar exam to earn a license
- Maintain that license with continuing legal education (CLE)
This rigorous process prepares lawyers to handle complex cases and carry the ultimate responsibility for legal decisions.
2. Legal Authority
One of the biggest differences between a paralegal and a lawyer is the authority each holds in the legal system. Although both are legal professionals and may handle substantive legal work, only a licensed lawyer has the legal power to act independently on behalf of clients.
A paralegal or legal assistant can perform tasks like researching cases, organizing evidence, and drafting legal documents, but they can’t offer legal advice or appear in court.
Plus, everything they do must be under the guidance of a supervising lawyer, and their work supports the attorney rather than replacing them. Even with formal education and years of experience, a paralegal cannot make legal decisions for clients.
A practicing attorney, on the other hand, meets strict education requirements and licensing requirements that allow them to represent people in court, give advice, and sign off on filings.
Additionally, they are fully responsible for client cases and must maintain their license through ongoing compliance with state rules.
The clear divide is that a paralegal can assist in legal matters, but only a lawyer can take legal action independently. This difference protects clients and keeps the legal system functioning with proper oversight.
3. Daily Tasks
The day-to-day job duties of a paralegal and a lawyer may seem similar at first glance, but they involve different levels of responsibility. Both handle legal tasks, but a licensed attorney carries the decision-making authority, while a paralegal focuses on support work.
In most law firms, paralegals spend their time preparing cases and assisting with documentation. Their work often includes:
- Conducting legal research and reviewing case law
- Drafting legal documents, pleadings, and other legal tasks for review
- Filing documents with courts and maintaining case files
- Handling some administrative tasks, like scheduling or client updates
Lawyers, on the other hand, focus on actions that require a license. Their job duties include meeting with clients, providing legal advice, negotiating settlements, and representing clients in court, among many others.
They also review and sign all filings because, unlike paralegals, they are legally responsible for the outcome of a case.
Briefpoint can lighten the load for both roles by automating document preparation, helping paralegals get through routine paperwork faster, and giving lawyers more time to focus on strategy and client advocacy.
4. Cost and Client Interaction
The way paralegals and lawyers interact with clients and the cost of their services clearly separate their roles. Paralegals focus on behind-the-scenes support and routine communication, while lawyers handle the critical conversations and carry the full responsibility for a case.
Let’s take a closer look:
Client Communications
Paralegals often handle the background communication that keeps cases moving. They might:
- Call or email clients for routine updates or to collect documents
- Organize client files and make sure everything is ready for the attorney’s review
- Schedule meetings or depositions for the lawyer
They may collect information and keep clients updated, but giving legal advice or making decisions remains the lawyer’s responsibility.
Lawyers, on the other hand, take the lead on all major communications. They meet with clients to discuss strategy, provide guidance, and answer legal questions. This direct interaction carries more responsibility because the lawyer’s advice can impact the outcome of a case.
Legal Fees
Cost is another area where the difference stands out. Paralegals usually bill at a lower hourly rate since their tasks focus on support and preparation. Their work helps reduce overall costs for clients by handling the repetitive, time-consuming tasks.
To put this into perspective, the National Association of Legal Assistants reports that the median hourly wage for paralegals and legal assistants in the United States is $24.87.
On the flip side, lawyers charge higher legal fees because they’re accountable for the case and provide the advice, representation, and strategic decisions clients rely on.
According to Clio’s Legal Trends Report, the average hourly billable rate for lawyers in 2024 was $341, showing the significant cost difference between support work and licensed legal representation.
Nevertheless, a typical law office combines both roles to give clients cost-effective service:
- Paralegal handles preparation and routine follow-ups
- Lawyer handles advice, representation, and final decisions
This team approach saves clients money while making sure they always have access to a licensed professional for the most important parts of their case.
5. Career Paths and Growth
Paralegals often build a specialized career as part of a legal team. Lawyers, by contrast, focus on courtroom work, client representation, and long-term opportunities like firm partnerships or corporate counsel roles.
Paralegals can grow their legal careers in several ways:
- Moving into senior or supervisory paralegal positions
- Gaining experience in high-demand practice areas like real estate or corporate law
- Shifting into training or legal operations within a firm
Networking through paralegal associations can also create paths to advancement or additional certifications.
The job market is steady but not fast-growing. According to the U.S. Bureau of Labor Statistics, employment of paralegals and legal assistants is expected to rise 1% from 2023 to 2033, slower than the average for all jobs.
Even so, around 37,300 openings per year are projected, mostly from retirements or people leaving the field.
On the other hand, lawyers typically have more room to advance into leadership roles, private practice, or specialized positions, making their career trajectory broader than that of most paralegals.
How Briefpoint Supports Lawyers and Paralegals
Paralegals and lawyers might handle different responsibilities, but together they keep a law firm running like clockwork.
Paralegals focus on the tasks that form the foundation of any case. Lawyers step in for the decision-making, client guidance, and courtroom work. When each role does its part, the legal team operates smoothly and clients get the attention they expect.
However, the way this work gets done is changing fast. Tasks like drafting discovery documents, preparing motions, and reviewing legal documents no longer have to eat up entire days.
Document automation and legal AI tools now handle the repetitive parts, giving paralegals more time for meaningful support and letting lawyers concentrate on strategy and client relationships.
Briefpoint makes this shift simple. It automates document preparation and review so you’re not buried in paperwork. Your paralegals get time back for meaningful support, your lawyers stay focused on strategy, and your cases move forward without the usual delays.
See how Briefpoint can simplify your legal workflow. Book your demo now.
Your Complete Guide to Trial Preparation & Trial Process
An Overview of the Trial Process
The entire trial process follows a series of courtroom procedures that guide how a case unfolds. While every case has its own twists, most trials follow a familiar structure. Below is a breakdown of the key stages, with a quick look at what happens in each step.
Pre-Trial Motions and Court Filings
Before the trial even begins, both sides may submit court filings that shape how the case will move forward. One common request is a motion for summary judgment, which asks the judge to decide the case without going to trial if the facts aren’t in dispute.
Another common filing is a motion to compel, which asks the court to require the other party to provide evidence or responses that were withheld during discovery.
Other pre-trial motions might aim to limit certain evidence or testimony. Taken together, these early steps can save time and narrow down the issues that will be addressed during the trial.
Jury Selection and Peremptory Challenges
In a jury trial, selecting who will sit on the jury is a critical step. Both attorneys question potential jurors to see if they can be fair. They may challenge certain jurors “for cause” if there’s a clear bias.
They also get a set number of peremptory challenges, which let them dismiss certain jurors without having to explain why. The goal is to form a jury that can weigh the evidence fairly and deliver an impartial verdict.
Opening Statement
Once the jury is seated (or immediately if it’s a bench trial), the trial begins with opening statements. Each side outlines what they plan to prove and sets the stage for the evidence that will follow.
This isn’t about arguing yet. Rather, it’s about giving the judge or jury a roadmap of the case. A strong opening statement helps the jury understand the story behind the facts and what they should watch for in the evidence presented.
Presentation of Evidence and Witness Testimony
After opening, each side takes turns presenting evidence. This includes:
- Physical documents
- Digital records
- Photos
- Anything else that supports their claims
Witness testimony is often the centerpiece, with witnesses sharing what they saw, heard, or know. All the witnesses are sworn in before speaking, and their statements help build or challenge the case narrative.
Cross Examination
Once a witness has given their testimony, the opposing attorney has the chance to ask questions through cross-examination. This is often one of the most intense parts of the trial process. The goal is to test the witness’s credibility, point out contradictions, or show weaknesses in their account.
Strong cross-examination can shake confidence in the other side’s case, while careful handling of your own witnesses can protect their credibility.
Closing Arguments
After all the witnesses and evidence are presented, the trial moves to closing arguments. This is the attorneys’ last chance to speak directly to the jury or judge about the case.
Unlike the opening statement, this is the time for persuasion. Lawyers tie together the evidence presented, highlight strengths in their side’s case, and point out flaws in the opponent’s. A clear and focused closing argument often leaves the strongest impression before deliberations begin.
Jury Deliberations and Verdict
In a jury trial, the case then goes to jury deliberations. The jurors review the evidence, discuss the testimony, and apply the law as explained by the judge.
The length of deliberations varies widely. It could take hours or weeks, depending on the complexity of the case. When the jury reaches a decision, they return to the courtroom to announce the verdict.
In bench trials, the judge takes on this role directly.
What is Trial Preparation?
Trial preparation is the stage where legal teams pull everything together before heading into court.
If you’re involved in a case, this is the part where your lawyer and their team review evidence, prepare witness lists, and put together a trial brief that lays out the legal arguments. They also meet with you to walk through what to expect in the courtroom, so you’re not caught off guard.
Trial preparation is about making sure deadlines are met and court rules are followed to ensure compliance. Your attorney will also think ahead, planning a legal strategy that responds to what the other party may bring up.
This process builds trial readiness and helps everyone feel confident that the case is solid. When preparation is done right, you walk into court knowing you’re ready for whatever comes next.
Who is Involved in Trial Preparation?
Trial preparation is often a team effort. The exact mix of people can depend on the type of case, like a civil trial or a criminal trial in federal district court.
Nevertheless, here are the main parties that usually take part:
- Defense attorney or plaintiff’s attorney – Leads trial preparation, builds legal arguments, and represents clients in court.
- Clients – Share information, review legal documents, and prepare to testify if needed.
- Paralegals and support staff – Organize case files, handle filings, and assist with scheduling.
- Expert witnesses – Offer specialized knowledge in areas like medicine, finance, or technology to support legal arguments.
- Investigators – Collect facts, locate witnesses, and gather evidence that may help the case.
- Co-counsel or legal teams – In larger cases, multiple attorneys may divide responsibilities to prepare thoroughly.
Each role contributes to trial readiness, and strong coordination between everyone involved helps build a more complete case.
Trial Preparation Checklist
A checklist helps you stay organized and makes sure the important steps aren’t missed. From reviewing filings to lining up witnesses, these are the tasks that set you up for trial readiness.
1. Review Pleadings, Motions, and Trial Brief
One of the first steps in preparing for trial is reviewing the pleadings, motions, and the trial brief. These documents frame the case and guide how the trial will unfold.
Pleadings outline the claims and defenses, while motions can shape what evidence is allowed in court. The trial brief pulls it all together and gives the judge a clear view of the legal arguments being made. So, of course, taking time here sets the tone for the rest of the preparation.
When going through these documents, legal teams usually focus on:
- Double-checking the trial date and any filing requirements
- Identifying rulings that could impact how evidence is used
- Making sure claims and defenses are fully understood
- Preparing a concise summary of legal arguments and proposed jury instructions
Careful review at this stage helps avoid surprises and makes sure everyone is aligned before stepping into the courtroom.
2. Organize Exhibits and Prepare Witness Lists
Organizing exhibits and preparing witness lists is one of the most important parts of thorough preparation. This step revolves around gathering all the information that will be shown in court, whether it’s physical evidence, digital files, or visual aids that help explain complex points.
Additionally, exhibits need to be labeled, indexed, and easy to access during trial so the legal team can present key evidence without delays.
Examples of physical evidence might include:
- Signed contracts
- Medical records
- Photographs
- Email or text communications
At the same time, preparing a strong witness list makes sure that every perspective is covered. A case may include the client, expert witnesses, or even an impartial person who can back up the facts.
Having both the exhibits and witnesses lined up gives the attorney a clear path forward and helps avoid last-minute issues in court.
3. Meet With Clients and Prepare Testimony
Meeting with clients before trial is a key step in building confidence and aligning on the case strategy. These sessions allow attorneys to explain how the trial will unfold and what to expect when the judge meets with both parties in court.
It’s also the stage where testimony is reviewed, so the client feels ready to answer questions clearly and consistently.
Preparation often includes going over the facts of the case, practicing likely questions, and making sure the client understands how their role supports the overall strategy.
Rehearsing testimony in advance helps reduce nerves and keeps the focus on delivering accurate, reliable answers once the trial begins.
4. Review and Organize Discovery Responses
Legal discovery is the stage where both sides exchange information, and reviewing those responses is a central part of preparing for trial.
Legal teams go through everything carefully to confirm that the other party has followed the rules and to make sure they’ve produced documents that could impact the case. Like the other steps, staying organized here avoids surprises and keeps the trial strategy solid.
Key steps often include:
- Checking that responses are complete and nothing important is missing
- Making sure the team is ready to produce documents requested by the other side
- Sorting through written answers and matching them with supporting evidence
Managing discovery can be time-consuming, especially when hundreds of requests are involved. Tools like Briefpoint make this easier by automating much of the drafting and formatting work.
On average, legal teams save 4 hours per discovery document, which means less time spent on repetitive paperwork and more time focusing on case strategy. See how it works today!
5. Draft Opening Statement, Closing Arguments, and Witness Questions
The final step in trial preparation is drafting the statements and questions that shape how the case is told in court. These pieces bring together all the key information gathered and give the legal team a clear script to follow.
At the federal level or in a local civil trial, this preparation is what ties evidence, witness testimony, and legal arguments into a single story that the judge or jury can follow.
Even if the case looks like it may end in a settlement, drafting these materials keeps the team ready in case the trial moves forward.
Key tasks include:
- Writing an opening statement that sets the stage and outlines the case
- Drafting witness questions for both direct and cross-examination
- Preparing closing arguments that summarize evidence and persuade the jury
- Anticipating motions like a directed verdict that could change the flow of the trial
The Role of Automation in Modern Litigation
Now that you’ve seen how each part of trial preparation fits together, it’s clear that success in the courtroom doesn’t happen by accident.
Every step builds toward trial readiness. And when legal teams are well-prepared, they’re able to present key information clearly and respond with confidence to the other party’s case.
The part that often eats up the most time is paperwork, especially in discovery. Document automation can help you reduce (or even eliminate) that burden and make a real difference in litigation.
Briefpoint takes the guesswork out of drafting discovery responses with a simple three-step process:
- Step one: Upload discovery requests, including Requests for Admission, Requests for Production, or Interrogatories.
- Step two: Add objections and responses, with AI suggesting and drafting tailored content while applying consistent standards across your firm.
- Step three: Download, sign, and serve. You can drag and drop completed documents into your CMS, set due dates on your calendar, and quickly finalize for review.
With automation handling the repetitive work, your team can focus on the parts of trial prep that matter most: legal strategy, arguments, and client success. Briefpoint makes it easier to get there. Book your demo today!